

Dedicated server
Hosting a Project Zomboid dedicated server can be done in Windows or Linux.
Downloading the Server Files
Through Steam
- Navigate to your Steam library and filter for tools
- Locate 'Project Zomboid Dedicated Server' and download/install it
Note: Do not launch the server via Steam. If accidentally done, verify the integrity of the files.
Through SteamCMD
SteamCMD is the command line version of Steam. The Valve Developer wiki has instructions on how to download and configure SteamCMD.
Once you have downloaded and extracted SteamCMD to the folder of your choosing, run it by executing steamcmd.exe from a command line.
You can now set up the installation directory where the dedicated server files will be stored.
The following is an example of setting the download directory to its own separate folder on the C: drive. You can choose wherever you would like to store the server files.
force_install_dir C:\PZServer
For Linux users, the server will install to /home/<MYOURUSERNAME>/.steam/steam/steamapps/common/Project Zomboid Dedicated Server/ unless specified otherwise.
Once you have set the install directory to your preference, login anonymously to Steam:
login anonymous
Next, download the Project Zomboid dedicated server files:
app_update 380870 validate
Once you see the message "Success! App '380870' fully installed", close SteamCMD:
quit
Forwarding Required Ports
Project Zomboid dedicated servers require the following open ports to successfully connect to clients:
8766 UDP
16261 UDP
Additional Ports for Non-Steam Server
In addition to the aforementioned ports required, TCP ports will have to be opened for each player slot on the server. E.g. if a server with 10 slots is desired, it would be necessary to open the following ports:
8766 UDP
16261 UDP
16262 - 16272 TCP
Note: It is possible these extra ports are no longer necessary as of game version 41.65.
Running the Server
Windows
Navigate to the download folder you specified (C:\pzserver if you followed the above steps) and locate the three StartServer batch files.
The default download directory if you used Steam to install the server is C:\Program Files (x86)\Steam\steamapps\common\Project Zomboid Dedicated Server
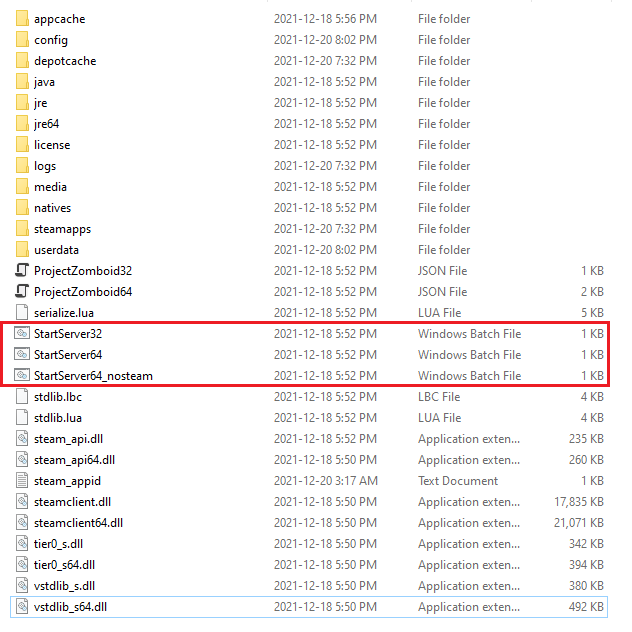
StartServer64 starts the Steam compatible 64-bit dedicated server.
StartServer64_nosteam starts the non-Steam 64-bit dedicated server.
Run the batch file that corresponds with your operating system. For most use cases this will be 64-bit unless you are intentionally running 32-bit or running the non-Steam version.
Important note: By default the StartServer64 batch file specifies 16GB of starting memory for the server. You must edit the StartServer64 file and change the -Xms and -Xmx files to the values you want to use for server memory, or the server will fail to start with memory errors.
An example with 6GB used for the amount of memory (note the -Xms and -Xmx values):
".\jre64\bin\java.exe" -Djava.awt.headless=true -Dzomboid.steam=1 -Dzomboid.znetlog=1 -XX:+UseZGC -XX:-CreateCoredumpOnCrash -XX:-OmitStackTraceInFastThrow -Xms6g -Xmx6g -Djava.library.path=natives/;natives/win64/;. -cp %PZ_CLASSPATH% zombie.network.GameServer -statistic 0
For reference, this is equivalent to the "Server Memory" option when using "Host" from the main menu to host a local multiplayer server.
Launching a server will open a command console window that begins executing the server on your machine. On the first run, it will prompt you to set a password for the admin account it will create. After the server finishes setting up with default game settings, a message will output indicating success or failure.

Linux
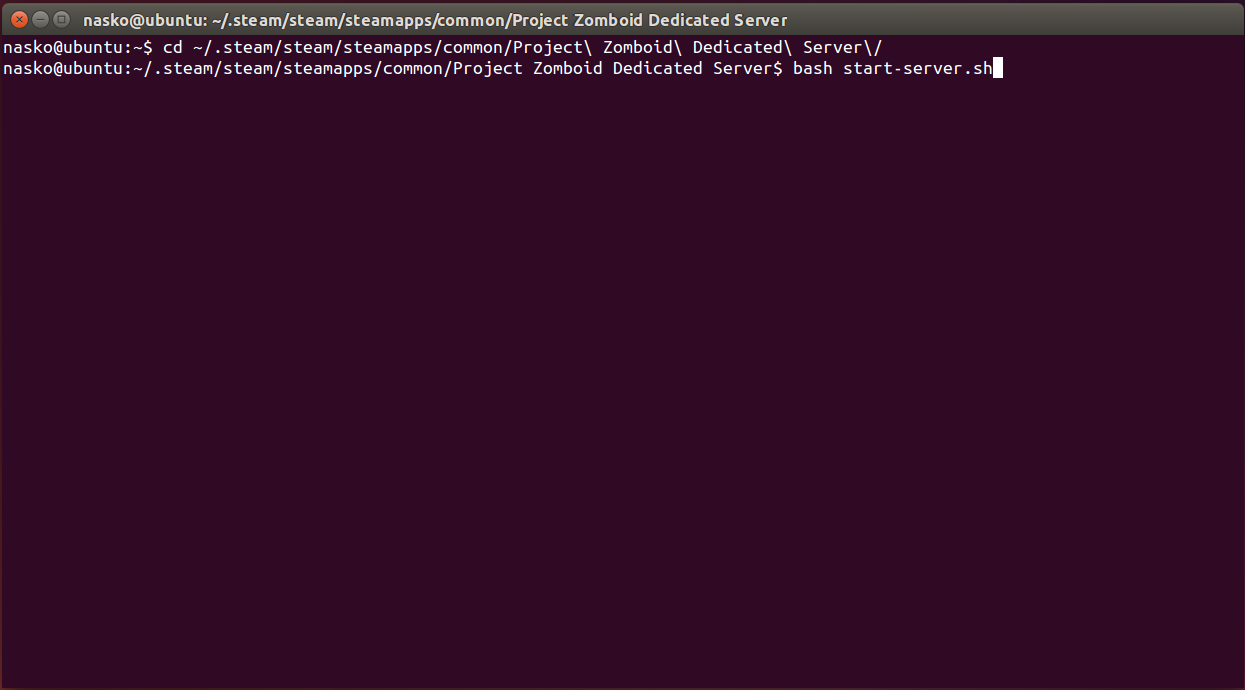
Navigate to your installation folder (default: /home/YOURUSERNAME/.steam/steam/steamapps/common/Project Zomboid Dedicated Server) and start the start-server.sh file. The following example uses the default folder:
cd ~/.steam/steam/steamapps/common/Project\ Zomboid\ Dedicated\ Server\/
Then start the start-server.sh
bash start-server.sh
Optionally, you can change the name of the server, this will change which .ini file is used and it will create a new save folder by this new server name:
bash start-server.sh -servername SERVERNAME
Launching a server will open a command console window that begins executing the server on your machine. On the first run, it will prompt you to set a password for the admin account it will create. After the server finishes setting up with default game settings, a message will output indicating success or failure.

Connecting to the Server

- Launch Project Zomboid
- Click the Join menu option
- Click the Favorites tab
- Add your public IPv4 address
- Enter port (default: 16261)
- Input your account details (anything desired)
- Click Save, select the added server and join
Note I: Hosting a non-Steam dedicated server requires players connect through the non-Steam version of the game client. For Steam game owners, this can be achieved by adding '-nosteam' to the launch options of Project Zomboid under its properties menu.
Note II: If hosting a server for LAN or VPN clients, the local IPv4 address or VPN defined address needs to be used.
Note III: As of game version 41.65, players who host and play on the same machine can solely use the public IPv4 address to connect to their server. If connection issues are encountered, consider adding your local IPv4 address to the Local IP field on the server screen. This address can be determined by clicking Start on the desktop, typing cmd, hitting enter, typing ipconfig in the opened command prompt and hitting enter.
Administrating the Server
There are a myriad of tools available for server administrators to customize and manage their servers.
Configuring the Server Game Settings
Windows
Server Data Save Locations
By default the server will look for game settings and world data named servertest inside C:\Users\YourUsername\Zomboid. If this data does not exist, the server will generate it automatically using default game settings. Use the following table for reference.
| Filename | File Location | Description |
|---|---|---|
| servertest.ini | C:\Users\YourUsername\Zomboid\Server | This file contains the server configuration settings. Editable with notepad. |
| servertest_SandboxVars.lua | C:\Users\YourUsername\Zomboid\Server | This file contains the server sandbox configuration settings. Editable with notepad. |
| servertest_spawnpoints.lua | C:\Users\YourUsername\Zomboid\Server | This file contains the spawnpoints available in your server. Setting custom spawn points is possible. Editable with notepad. |
| servertest_spawnregions.lua | C:\Users\YourUsername\Zomboid\Server | This file contains the regions available for spawning (i.e. Muldraugh, Rosewood, etc). Editable with notepad. |
| n/a | C:\Users\YourUsername\Zomboid\Saves\Multiplayer\servertest | This folder contains the generated/saved world data of the server. |
Customizing Settings
Customizing server settings can be accomplished in two ways.
- Through the game client
- Editing the relevant files in notepad
To customize settings using the game client, launch Project Zomboid and select the Host menu option followed by the Manage Settings menu option.
If the server was successfully run at least once:
- Select servertest from the the list of saved server settings
- Click Edit Settings
- Edit desired settings and save
If the server was not run at least once:
- Click Create New Settings
- Name these settings servertest
- Edit desired settings and save
The next time the server successfully starts it will use the defined servertest.ini and lua files. The settings can be verified by using the admin command showoptions or opening servertest.ini, servertest_SandboxVars.lua, servertest_spawnpoints.lua, and servertest_spawnregions.lua in notepad.

Note: Changes can be saved to servertest.ini while the server is running. After servertest.ini is saved, use admin command reloadoptions to make the changes live.
Linux
Under construction.
Admin Commands
The following commands can be executed either on the server console window or in-game (preceded by a forward slash) provided the user has admin status.
| Command | Description |
|---|---|
| addalltowhitelist | Add all the current users who are connected with a password to the whitelist, so their account is protected. |
| additem | Give an item to a player. If no username is given then you will receive item. Count is optional. Use: /additem \"username\" \"module.item\" count, ex : /additem \"rj\" \"Base.Axe\" count |
| adduser | Use this command to add a new user to a whitelisted server. Use: /adduser \"username\" \"pwd\" |
| addusertowhitelist | Add a user connected with a password to the whitelist, so their account is protected. Use: /addusertowhitelist \"username\" |
| addvehicle | Spawn a vehicle. Use: /addvehicle \"script\" \"user or x,y,z\", ex /addvehicle \"Base.VanAmbulance\" \"rj\" |
| addxp | Give experience points to a player. Use: /addxp \"playername\" perkname=xp, ex /addxp \"rj\" Woodwork=2 |
| alarm | Sound a building alarm at the Admin's position. (Must be in a room.) |
| banid | Ban a SteamID. Use: /banid SteamID |
| banuser | Ban a user. Add a -ip to also ban the IP. Add a -r \"reason\" to specify a reason for the ban. Use: /banuser \"username\" -ip -r \"reason\". For example: /banuser \"rj\" -ip -r \"spawn kill\" |
| changeoption | Change a server option. Use: /changeoption optionName \"newValue\" |
| chopper | Place a helicopter event on a random player |
| createhorde | Spawn a horde near a player. Use : /createhorde count \"username\", ex /createhorde 150 \"rj\", username is optional except from the server console. |
| createhorde2 | Unknown (ERROR: Missing translation "UI_ServerOptionDesc_CreateHorde2") |
| godmod | Make a player invincible. No username set will toggle self-invincibility. Use: /godmode \"username\" -value, ex /godmode \"rj\" -true (could be -false) |
| gunshot | Place gunshot sounds on a random player |
| help | Outputs a list and description of admin commands |
| invisible | Make a player invisible to zombies. No username provided will toggle invisibility on yourself. Use: /invisible \"username\" -value, ex /invisible \"rj\" -true (could be -false). |
| kickuser | Kick a user. Add a -r \"reason\" to specify a reason for the kick. Use: /kickuser \"username\" -r \"reason\" |
| noclip | Makes a player pass through walls and structures. Toggles with no value. Use: /noclip \"username\" -value, ex /noclip \"rj\" -true (could be -false) |
| players | List all connected players |
| quit | Save and shut down the server |
| releasesafehouse | Release a safehouse you own. Use: /safehouse release |
| reloadlua | Reload a Lua script. Use: /reloadlua \"filename\" |
| reloadoptions | Reload server options (servertest.ini) and send to the clients. Useful for implementing game setting changes while players are connected. |
| removeuserfromwhitelist | Remove a user from the whitelist. Use: /removeuserfromwhitelist \"username\" |
| removezombies | Command name self-explanatory, but have not tested. (ERROR: Missing translation "UI_ServerOptionDesc_RemoveZombies") |
| replay | Record and play replay for moving player. Use: /replay \"playername\" -record\-play\-stop \filename.\ Example: /replay user1 -record test.bin |
| save | Saves the current game world |
| sendpulse | Toggle sending server performance info to this client. Use: /sendpulse |
| servermsg | Broadcast a message to all connected players. Use: /servermsg \"text\" |
| setaccesslevel | Set access level of a player. Current levels: admin, moderator, overseer, gm, observer. E.g. setaccesslevel userName admin / Note: To remove any access level, use "none" in place of admin. |
| showoptions | Show the list of current server options and values. |
| startrain | Start rain on the server |
| stoprain | Stop rain on the server |
| teleport | Teleport to a player. Use: /teleport \"playername\" or /teleport \"player1\" \"player2\", ex /teleport \"rj\" or /teleport \"rj\" \"toUser\" |
| teleportto | Teleport to coordinates. Use: /teleportto x,y,z, ex /teleportto 100098,189980,0 |
| unbanid | Unban a SteamID. Use: /unbanid SteamID |
| unbanuser | Unban a player. Use : /unbanuser \"username\" |
| voiceban | Block voice from user \"username\". Use : /voiceban \"username\" -value, ex /voiceban \"rj\" -true (could be -false) |