Dedicated server
Hosting a Project Zomboid dedicated server can be done in Windows or Linux.
Downloading the server files
Through Steam
- Navigate to your Steam library and filter for tools
- Locate 'Project Zomboid Dedicated Server' and download/install it
Through SteamCMD
SteamCMD is the command line version of Steam. The Valve Developer wiki has instructions on how to download and configure SteamCMD.
Windows
Once you have downloaded and extracted SteamCMD to the folder of your choosing, run it by executing steamcmd.exe from a command line.
You can now set up the installation directory where the dedicated server files will be stored.
The following is an example of setting the download directory to its own separate folder on the C: drive. You can choose wherever you would like to store the server files.
force_install_dir C:\PZServer
For Linux users, the server will install to /home/<MYOURUSERNAME>/.steam/steam/steamapps/common/Project Zomboid Dedicated Server/ unless specified otherwise.
Once you have set the install directory to your preference, login anonymously to Steam:
login anonymous
Next, download the Project Zomboid dedicated server files:
app_update 380870 validate
Once you see the message "Success! App '380870' fully installed", close SteamCMD:
quit
Linux
For Debian and Ubuntu, first install steamcmd:
sudo add-apt-repository multiverse; sudo dpkg --add-architecture i386; sudo apt update
sudo apt install steamcmd
You might need to enable non-free repository:
sudo apt-get install software-properties-common -y
sudo apt-add-repository non-free
Proceed to Install steamcmd:
sudo dpkg --add-architecture i386
sudo apt-get update -y
sudo apt-get install steamcmd -y
Don't run the server as root. Add an user as pzuser:
sudo adduser pzuser
We will install Zomboid Server in /opt/pzserver:
sudo mkdir /opt/pzserver
sudo chown pzuser:pzuser /opt/pzserver
Log in as pzuser:
sudo -u pzuser -i
Create the configuration file /home/pzuser/update_zomboid.txt that will manage steamcmd:
cat >$HOME/update_zomboid.txt <<'EOL'
// update_zomboid.txt
//
@ShutdownOnFailedCommand 1 //set to 0 if updating multiple servers at once
@NoPromptForPassword 1
force_install_dir /opt/pzserver/
//for servers which don't need a login
login anonymous
app_update 380870 validate
quit
EOL
Now install Project Zomboid Server. You will use this same command every time you want to update the server to the latest version.
export PATH=$PATH:/usr/games
steamcmd +runscript $HOME/update_zomboid.txt
Forwarding required ports
Project Zomboid dedicated servers require the following open ports to successfully connect to clients:
- 16261 UDP
- 16262 UDP - Direct Connection Port
Linux
A common firewall used to open ports on Linux is UFW (Uncomplicated Firewall). To open the required ports on the firewall you can run:
# Open the ports
sudo ufw allow 16261/udp
sudo ufw allow 16262/udp
# Reload the firewall to make the added rules go into effect
sudo ufw reload
Running multiple servers from a single box
The ports above are default for the first server in the SERVERNAME.ini file. If you're running multiple instances of PZ on a single Linux Box, you'll need to follow these steps:
- Create 2 separate accounts in Linux from the home directory
- Run steamcmd in under both users to create two instances of steamcmd.
- Run the
login anonymous&app_update 380870 validatecommands under both users (via scripts if preferred - you'll need to duplicate the scripts above under each user and edit directories accordingly if so) - Before running the 2nd server instance, be sure to open further UDP ports on your Server (e.g. 16274 + 16275).
- Edit the
SERVERNAME.inifile in the 2nd Steam Instance to reflect these ports under the UDP Port settings).
Each instance will require 2 clear UDP ports.
Ports used before version 41.77
- 16261 UDP
- 8766, 8767 UDP
Running the server
Windows
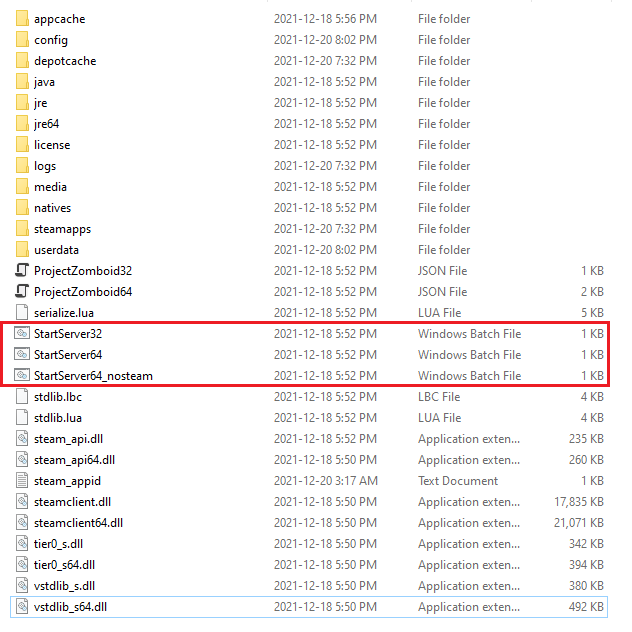
Navigate to the download folder you specified (C:\pzserver if you followed the above steps) and locate the three StartServer batch files.
The default download directory if you used Steam to install the server is C:\Program Files (x86)\Steam\steamapps\common\Project Zomboid Dedicated Server
Run the batch file that corresponds with your operating system. For most use cases this will be 64-bit unless you are intentionally running 32-bit or running the non-Steam version.
-Xms and -Xmx files to the values you want to use for server memory, or the server will fail to start with memory errors.An example with 6 GB used for the amount of memory (note the -Xms and -Xmx values):
".\jre64\bin\java.exe" -Djava.awt.headless=true -Dzomboid.steam=1 -Dzomboid.znetlog=1 -XX:+UseZGC -XX:-CreateCoredumpOnCrash -XX:-OmitStackTraceInFastThrow -Xms6g -Xmx6g -Djava.library.path=natives/;natives/win64/;. -cp %PZ_CLASSPATH% zombie.network.GameServer -statistic 0
For reference, this is equivalent to the "Server Memory" option when using "Host" from the main menu to host a local multiplayer server.
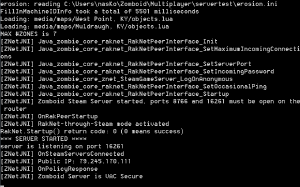
Launching a server will open a command console window that begins executing the server on your machine. On the first run, it will prompt you to set a password for the admin account it will create. After the server finishes setting up with default game settings, a message will output indicating success or failure.
Linux
First, start tmux. Using tmux will prevent your server from being shut down if you accidentally close your terminal window or your ssh connection gets disconnected. You can run tmux a to bring the PZ server console back up if that happens. If you get a "command not found" message when you try to run tmux, then run apt-get install tmux to install it.
tmux
Navigate to your installation folder (default: /home/YOURUSERNAME/.steam/steam/steamapps/common/Project Zomboid Dedicated Server) and start the start-server.sh file. The following example uses the default folder:
cd ~/.steam/steam/steamapps/common/Project\ Zomboid\ Dedicated\ Server\/
However, if you followed the instructions in this page to install Project Zomboid Server via steamcmd in Linux, navigate to the folder that was specified in that install script:
cd /opt/pzserver/
Then start the start-server.sh
bash start-server.sh
Optionally, you can change the name of the server, this will change which .ini file is used and it will create a new save folder by this new server name:
bash start-server.sh -servername SERVERNAME
Launching a server will open a command console window that begins executing the server on your machine. On the first run, it will prompt you to set a password for the admin account it will create. After the server finishes setting up with default game settings, a message will output indicating success or failure.
Systemd
An option is to configure the server to run under system.d.
Before you do this:
- manually start the server (as described above) at least once because the first time you are asked to input an admin password.
- make sure you are no longer logged in as pzuser (type
exitif you are) - the system.d commands are to be run as root.
First, configure the system.d unit:
cat >/etc/systemd/system/zomboid.service <<'EOL'
[Unit]
Description=Project Zomboid Server
After=network.target

[Service]
PrivateTmp=true
Type=simple
User=pzuser
WorkingDirectory=/opt/pzserver/
ExecStart=/bin/sh -c "exec /opt/pzserver/start-server.sh </opt/pzserver/zomboid.control"
ExecStop=/bin/sh -c "echo save > /opt/pzserver/zomboid.control; sleep 15; echo quit > /opt/pzserver/zomboid.control"
Sockets=zomboid.socket
KillSignal=SIGCONT

[Install]
WantedBy=multi-user.target
EOL
Second, add a "zomboid.socket FIFO service", this will allow us to issue commands to the server, and guarantee a safe shutdown.
cat >/etc/systemd/system/zomboid.socket <<'EOL'
[Unit]
BindsTo=zomboid.service

[Socket]
ListenFIFO=/opt/pzserver/zomboid.control
FileDescriptorName=control
RemoveOnStop=true
SocketMode=0660
SocketUser=pzuser

EOL
Once you have done that, you have the following commands available:
# start a server
systemctl start zomboid.socket

# stop a server
systemctl stop zomboid

# restart a server
systemctl restart zomboid

# check server status (ctrl-c to exit)
systemctl status zomboid
The logs are now managed by journalctl. To access to the logs of the server, execute the following command:
journalctl -u zomboid -f
To send commands to the server, use the following command:
echo "command" > /opt/pzserver/zomboid.control
If you use sudo to elevate permissions on your system, you should use:
echo "command" | sudo tee /opt/pzserver/zomboid.control
To see if your command worked, check journalctl, a good command to test with is help.
Connecting to the server
- Launch Project Zomboid
- Click the Join menu option
- Click the Favorites tab
- Add your public IPv4 address
- Enter port (default: 16261)
- Input your account details (anything desired)
- Click Save, select the added server and join
-nosteam to the launch options of Project Zomboid under its properties menu.ipconfig in the opened command prompt and hitting enter.Administrating the server
There are a myriad of tools available for server administrators to customize and manage their servers.
Configuring the server game settings
Windows
Server data save locations
By default the server will look for game settings and world data named servertest inside C:\Users\YourUsername\Zomboid. If this data does not exist, the server will generate it automatically using default game settings. Use the following table for reference.
servertest.iniinC:\Users\YourUsername\Zomboid\Server- This file contains the server configuration settings. Editable with notepad.
servertest_SandboxVars.luainC:\Users\YourUsername\Zomboid\Server- This file contains the server sandbox configuration settings. Editable with notepad.
servertest_spawnpoints.luainC:\Users\YourUsername\Zomboid\Server- This file contains the spawnpoints available in your server. Setting custom spawn points is possible. Editable with notepad.
servertest_spawnregions.luainC:\Users\YourUsername\Zomboid\Server- This file contains the regions available for spawning (i.e. Muldraugh, Rosewood, etc). Editable with notepad.
servertestfolder inC:\Users\YourUsername\Zomboid\Saves\Multiplayer- This folder contains the generated/saved world data of the server.
Customizing settings
Customizing server settings can be accomplished in two ways.
- Through the game client
- Editing the relevant files in notepad
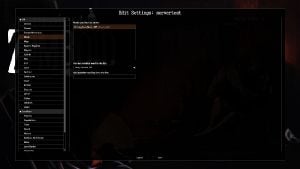
To customize settings using the game client, launch Project Zomboid and select the Host menu option followed by the Manage Settings menu option.
If the server was successfully run at least once:
- Select servertest from the the list of saved server settings
- Click Edit Settings
- Edit desired settings and save
If the server was not run at least once:
- Click Create New Settings
- Name these settings servertest
- Edit desired settings and save
The next time the server successfully starts it will use the defined servertest.ini and lua files. The settings can be verified by using the admin command showoptions or opening servertest.ini, servertest_SandboxVars.lua, servertest_spawnpoints.lua, and servertest_spawnregions.lua in notepad.
servertest.ini while the server is running. After servertest.ini is saved, use admin command reloadoptions to make the changes live.Customizing server name
You may customize your server's name to something other than servertest in order to either have worlds you can quickly read and identify, or to be able to switch to a new world without having to move a bunch of files on both server and client side to preserve that world.
First and foremost, be aware that player map data is stored locally client side under your IP address and port. If you don't want map information bleedover, you may need to change the port in your server settings.
If you are trying to save an existing server, you have two choices ahead of you:
- Never use port 16261 for any other PZ servers.
- Have anyone who has previously joined look for a file named something like
123.45.0.12_16261_a589371111b0ccerf81acc30e918f8c9[server ip address _ server port _ something] located atC:\Users\YourUsername\Zomboid\Savesand have them put it somewhere safe or edit the folder name.
Then make a copy of whichever one you used to launch servertest normally by selecting it, right clicking, select copy, right click somewhere in empty space, paste.
Rename the new file (or don't).
Open the file in some text editor (such as notepad) and insert:
-servername YOURSERVERNAME behind -cp %PZ_CLASSPATH% zombie.network.GameServer
Example with server name of "pizza":
@setlocal enableextensions
@cd /d "%~dp0"
SET PZ_CLASSPATH=java/istack-commons-runtime.jar;java/jassimp.jar;java/javacord-2.0.17-shaded.jar;java/javax.activation-api.jar;java/jaxb-api.jar;java/jaxb-runtime.jar;java/lwjgl.jar;java/lwjgl-natives-windows.jar;java/lwjgl-glfw.jar;java/lwjgl-glfw-natives-windows.jar;java/lwjgl-jemalloc.jar;java/lwjgl-jemalloc-natives-windows.jar;java/lwjgl-opengl.jar;java/lwjgl-opengl-natives-windows.jar;java/lwjgl_util.jar;java/sqlite-jdbc-3.27.2.1.jar;java/trove-3.0.3.jar;java/uncommons-maths-1.2.3.jar;java/
".\jre64\bin\java.exe" -Djava.awt.headless=true -Dzomboid.steam=1 -Dzomboid.znetlog=1 -XX:+UseZGC -XX:-CreateCoredumpOnCrash -XX:-OmitStackTraceInFastThrow -Xms4g -Xmx4g -Djava.library.path=natives/;natives/win64/;. -cp %PZ_CLASSPATH% zombie.network.GameServer -servername pizza -statistic 0
PAUSE
Just running this will create a world with all the requisite files with the default settings, which you can edit later.
If you've already created a server with a name you want to use with all the settings set the way you want, use the same name as the file at C:\Users\%your username%\Zomboid\db.
Linux
Server data save locations
By default the server will look for game settings and world data named servertest inside ~/Zomboid (assuming you followed the instructions above that would be /home/pzuser/Zomboid). If this data does not exist, the server will generate it automatically using default game settings. Use the following file list for reference.
servertest.iniin~/Zomboid/Server- This file contains the server configuration settings. Editable with notepad.
servertest_SandboxVars.luain~/Zomboid/Server- This file contains the server sandbox configuration settings. Editable with notepad.
servertest_spawnpoints.luain~/Zomboid/Server- This file contains the spawnpoints available in your server. Setting custom spawn points is possible. Editable with notepad.
servertest_spawnregions.luain~/Zomboid/Server- This file contains the regions available for spawning (i.e., Muldraugh, Rosewood, etc.). Editable with notepad.
servertestfolder in~/Zomboid/Saves/Multiplayer- This folder contains the generated/saved world data of the server.
Admin commands
- Main article: Admin commands
The admin commands can be executed either on the server console window or in-game (preceded by a forward slash when used in-game) provided the user has admin status. For a list of commands, see admin commands.
/help command can be used to show all available commands.
Installing mods
- Save all mods to a steam workshop collection
- Paste collection url into PZ ID Grabber
- Open your
SERVERNAME.inifile - In
Mods=section paste the mods into the file - In
WorkshopItems=section paste the workshop Items Ids
Troubleshooting
Can't connect to own server, stuck in the loading screen (steam client version)
- Verify that the saved profile for your server in the server 'favorites' tab is using your actual public IPv4 address (WhatismyIP) and that the 16261 UDP port is forwarded in your router.
- Close the server using the "quit" command, verify integrity of server files, relaunch the server using only the "StartServer32.bat" or "StartServer64.bat" executable found where the server is installed. DO NOT use the Steam client to launch the server, and if you do, verify the server files again.
- Connect to the server.
Character stuck in void after joining
This might happen if you are using a pre-existing profile to connect to a server which was previously hosted using the in-game "Host" function. To solve:
- Disconnect from the server.
- Create a new profile by changing your account name in the "add server panel", e.g., "player" becomes "player_1". Remember to "SAVE" so the client remembers your new profile.
- Connect to the server. Your new character should be placed at one of the ordinary spawn positions.


