

Survival Guide/pt-br: Difference between revisions
Rpissolato (talk | contribs) |
m (Simplified redundant links) |
||
| (54 intermediate revisions by 10 users not shown) | |||
| Line 1: | Line 1: | ||
{{ | {{Header|Project Zomboid|Game mechanics|Guides}} | ||
{{ | {{Outdated}} | ||
{{Translate}} | |||
{| class="wikitable theme-red" align="right" | |||
| style="background-color:#DFDFDF; padding:0;" | [[Image:Spiffo_Survivor.png|x250px]] | |||
|- | |||
! style="font-weight:normal" | ''Spiffo é o verdadeiro sobrevivente.'' | |||
|} | |||
<div style="float:left;margin-right: 1em;">__TOC__</div> | <div style="float:left;margin-right: 1em;">__TOC__</div> | ||
==Introdução== | ==Introdução== | ||
===Prefácio=== | ===Prefácio=== | ||
Bem vindo ao Guia de Sobrevivência para iniciantes. Este guia irá cobrir alguns tópicos relacionados ao Project Zomboid, e é dirigido a novos jogadores, apesar de também poder ser usado por jogadores veteranos para atualização ou como referência. Este guia irá ensinar aos jogadores o básico da sobrevivência, combate e exploração. | Bem vindo ao Guia de Sobrevivência para iniciantes. Este guia irá cobrir alguns tópicos relacionados ao Project Zomboid, e é dirigido a novos jogadores, apesar de também poder ser usado por jogadores veteranos para atualização ou como referência. Este guia irá ensinar aos jogadores o básico da sobrevivência, combate e exploração. Este guia é voltado para o modo Sobrevivente. | ||
Embora o guia tenha sido criado para ser lido por inteiro, cada sessão pode ser lida independentemente, isso permite ao leitor pular para partes que o interessa, pois há múltiplas formas de jogar Project Zomboid. Se você quer ter uma experiência autêntica (sem influência deste guia), recomendamos que tente jogar sem esse guia primeiro, | Embora o guia tenha sido criado para ser lido por inteiro, cada sessão pode ser lida independentemente, isso permite ao leitor pular para partes que o interessa, pois há múltiplas formas de jogar Project Zomboid. Se você quer ter uma experiência autêntica (sem influência deste guia), recomendamos que tente jogar sem esse guia primeiro, e caso tenha dificuldades pode voltar e fazer uma leitura nos tópicos. | ||
===Interface=== | ===Interface=== | ||
[[File:InterfaceGuide.png|right|thumb|500px|Interface do jogo (HUD).]] | |||
Esta é a interface do Project Zomboid na versão mais recente. | |||
Os elementos foram destacados na imagem à direita, confira a legenda: | |||
1) [[Player|Personagem do jogador]] (Você!)<br> | |||
2) Equipamento primário, normalmente para [[Weapons|Armas]] e ferramentas<br> | |||
3) Equipamento secundário, geralmente serve para carregar coisas de uso indireto (sacolas plásticas, saco de lixo, mochila de viagem, [[Bags|etc.]]) ou para algumas armas grandes que necessitam as duas mãos.<br> | |||
4) [[Inventory|Menu de inventário]]<br> | |||
5) Menu de [[Health|status do personagem]]<br> | |||
6) [[Crafting|Menu de fabricação]]<br> | |||
7) [[Controls#Build.2FMove Mode|Menu de móveis]], para mover, girar e pegar móveis e itens maiores<br> | |||
8) [[Foraging|Modo de procura]] é uma habilidade de sobrevivência que permite procurar por alimentos e recursos em qualquer área.<br> | |||
9) O [[Map|Mapa]] é usado para navegar pelas cidades em Knox Country.<br> | |||
10) [[Controls#Time_Controls|Hora atual]]. Exibido apenas ao transportar um dispositivo que mostra a hora (O [[Digital Watch|Relógio Digital]] é bem comum de se achar em zumbis mortos)<br> | |||
11) Controle de tempo, serve para acelerar ou pausar o tempo no modo de jogo Solo.<br> | |||
12) [[Survival Guide#Moodles|Humores]], que mostra quaisquer modificador de humor de seu personagem<br> | |||
13) A Hotbar é uma barra de seleção onde o jogador armazena e seleciona as armas ou objetos mais usados, os itens ficam visíveis nas [[Weapons#One-Handed|costas]] ou no [[Belt|cinto]]. | |||
=== | ====Controle e gestão de inventario==== | ||
''Algumas funcionalidades da interface passam despercebidas...''<br> | |||
1) Itens do inventário podem ser agrupados ao segurar o botão esquerdo e arrastar o cursor realçando os itens desejados. <br> | |||
2) Itens individuais também podem ser agrupados, segurando a tecla '''CTRL''' enquanto seleciona os itens desejados. <br> | |||
3) Itens podem ser movidos e largados em novos recipientes ou no chão ao soltar o botão esquerdo fora da janela existente.<br> | |||
Entretanto, entenda: '''''A morte é inevitável'''''. Nas primeiras vezes que você for jogar, provavelmente se encontrará em situações desconfortáveis, onde não terá escapatória. Isso acontece | <gallery mode=packed heights=90px> | ||
file:Inventory_Drag.gif|Arrastando | |||
file:Inventory_CTRLClick.gif|CTRL + clique | |||
file:Inventory_LootAll.gif|Botão de Pegar tudo | |||
</gallery> | |||
===Criação de Personagem=== | |||
[[File:CharacterCreation.png|right|thumb|390px|The character creation menu.]] | |||
Assim que você inicia um novo jogo, e escolhe o mapa desejado, inicia-se a criação do personagem. Para acessar o guia de criação do personagem, visite a página [[Player/pt-br]]. Este guia mostra todas as telas que serão encontradas até o início do jogo, explicando os [[Traits/pt-br|Atributos e benefícios]] para as variadas profissões. | |||
Entretanto, entenda: '''''A morte é inevitável'''''. Nas primeiras vezes que você for jogar, provavelmente se encontrará em situações desconfortáveis, onde não terá escapatória. Isso acontece às vezes. Não é porque você é ruim, acontece apenas porque você é um novato. Com o tempo você aprende, a cada partida você ganha mais experiência e vai melhorando, para futuramente jogar com outros personagens e sobreviver por mais tempo. | |||
Quando você cria um personagem, e dá a ele atributos, você vai moldando a sua personalidade, abaixo há exemplos de personalidades formadas, mas primeiro uma breve discussão sobre os atributos e você vai poder entender o motivo de alguns atributos não aparecem para a escolha. Atualmente o jogo encontra-se incompleto, e por isso alguns atributos requerem equilíbrio, ou seja, o atributo contrário em alguns casos não foi implementado ainda, porém, futuramente vários atributos estarão disponíveis. | Quando você cria um personagem, e dá a ele atributos, você vai moldando a sua personalidade, abaixo há exemplos de personalidades formadas, mas primeiro uma breve discussão sobre os atributos e você vai poder entender o motivo de alguns atributos não aparecem para a escolha. Atualmente o jogo encontra-se incompleto, e por isso alguns atributos requerem equilíbrio, ou seja, o atributo contrário em alguns casos não foi implementado ainda, porém, futuramente vários atributos estarão disponíveis. | ||
'''Exemplos de personalidades negativas fáceis:''' [[Traits/pt-br#Negativos|Covarde]], [[Traits/pt-br#Negativos|Pacifista]], [[Traits/pt-br#Negativos|Semi-analfabeto]], [[Traits/pt-br#Negativos|Comilão]] e [[Traits/pt-br#Negativos|Sedento]]. | |||
Covarde e Pacifista não tem muito impacto negativo, pois você deve fugir dos zumbis em vez de tentar combatê-los desde o início, até adquirir um [[Baseball_Bat|Bastão de Beisebol]], [[Axe|Machado]] ou uma [[Campfire|fogueira]] ([[Campfire_Materials|Materiais da Fogueira]]). Semi-analfabeto não tem nenhum efeito "negativo", por si só, já que na verdade não diminui nenhuma habilidade. É apenas uma perda de tempo, pois a leitura leva mais tempo do que o normal, mas não é um problema, desde que você tenha certeza de que está seguro antes de começar a ler. Comilão e Sedento também não são difíceis de equilibrar, pois você precisará comer e beber um pouco mais, então fica fácil caso mantenha uma boa administração e um suprimento constante de comida e água disponível. | |||
[[Traits/pt-br#Negativos|Dorminhoco]] e [[Traits/pt-br#Negativos|Acima do peso]] são mais difíceis até certo ponto, mas ainda sim vale a pena. Embora o excesso de peso reduza sua habilidade inicial de condicionamento físico em dois pontos inicialmente, ela pode ser equilibrada se você tiver o hábito de correr, e o condicionamento físico pode subir acima do normal se você sobreviver por tempo suficiente. Dorminhoco se aplica no mesmo sentido do Semi-analfabeto, pois você precisará dormir mais, então você só precisa ter certeza de que está seguro antes de dormir. | |||
{|width=100% border=0 | {|width=100% border=0 | ||
| Line 53: | Line 71: | ||
[[File:Legenda.png|center]] | [[File:Legenda.png|center]] | ||
== | ==Evolução do jogo== | ||
===Primeiros passos=== | |||
=== | O início de sua aventura pode ser a parte mais difícil do jogo. Se você é um novo jogador, você vai poder ler e jogar o tutorial completo para se acostumar com o básico do jogo, como se movimentar, abrir contêineres e como funciona o combate. | ||
==== | ====O que fazer==== | ||
Em Project Zomboid você começa em uma casa ou trailer. Seus primeiros objetivos são achar [[Weapons|armas]], [[Food|alimentos]] e uma [[Bags|mochila]]. Caso você queira ficar na casa onde começou e fazer um esconderijo, certifique-se de que as janelas do primeiro andar tenham cortinas. Se não tiver, tente procurar em armários e quartos por alguns [[Sheet|lençóis]] pois eles podem ser transformados em cortinas. Se você não conseguir encontrar [[Sheet|lençóis]] suficientes e vir um algum zumbi por fora da [[Window|janela]]; ''não entre em pânico, seja cauteloso''. Eles não vão notar você desde que você fique longe da [[Window|janela]] e não faça [[Noise|barulho]], não corra, grite e nem tente bater em alguma coisa com sua arma seja ela qual for. Desligar as luzes em sua casa também aumentará suas chances de não ser visto. As luzes podem ser ligadas ou desligadas clicando em um interruptor de luz na parede se seu personagem estiver perto o suficiente. | |||
Se | Às vezes você pode ser visto por zumbis. Se eles estiverem se aproximando, fuja e perca a linha de visão. Isso pode ser feito entrando em um prédio ou casa, fechando a porta por onde entrou e saindo pelos fundos (por exemplo). Então tente encontrar um esconderijo melhor ou, se puder, chame a atenção de [[Zombie|zumbis]] próximos e leve-os para longe de sua área, apenas para tornar as coisas um pouco mais seguras. Caso contrário, você pode ficar uma ou duas noites se tiver cortinas suficientes no térreo, desde que fique quieto e não faça muito [[Noise|barulho]]. No entanto, tenha em mente que pode haver o risco de Zumbis invadirem seu esconderijo com [[Metagame#Helicopter Event|ruído de helicóptero]] ou [[Metagame|eventos de som ambiente]] como tiros e gritos. O [[Metagame#Helicopter Event|helicóptero]] aparecerá no máximo duas vezes no primeiro mês, normalmente no final da primeira semana. Mas isso pode ser ignorado se você encontrar um [[Radio|rádio]] com a [[Automated Emergency Broadcast System|estação de rádio Automated Emergency Broadcast System (AEBS)]], pois isso irá informá-lo quando o [[Metagame#Helicopter Event|helicóptero]] virá, dizendo 'Atividade Aérea Detectada'. | ||
Coletar [[Food|alimentos]] também é uma prioridade (coma os [[Food#perishable|perecíveis]] primeiro, e guarde os [[Food#Non-perishable|não-perecíveis]] para mais tarde, a menos que você esteja com muita [[Hungry|fome]]), assim como coletar e encher algumas [[Empty Mug|canecas vazias]] e [[Cooking Pot|panelas]] com água, guardando-as para quando a energia elétrica e a água pararem de serem distribuídas. A energia elétrica e a água podem ser desligadas em qualquer lugar de um a dois dias a partir do primeiro dia (se você for realmente azarado) ou normalmente em 1 mês. (Este tempo pode ser alterado nas [[Game Modes#Custom Sandbox|configurações do sandbox]]). | |||
Esta lista é um exemplo do que saquear em prioridades (negrito é essencial): | |||
*[[Weapons|Armas]] | *'''[[Bags|Mochila]]''' (quanto mais capacidade e redução de peso, melhor é a mochila! A melhor mochila é a [[Large_Backpack|Mochila Militar]]) | ||
*[[Sheet| | *'''[[Weapons|Armas]]''' ([[Baseball Bat|taco de beisebol]], [[Frying Pan|frigideira]], [[Rolling Pin|rolo de massa]] ou [[Golf Club|taco de golfe]] servirá muito bem no começo) | ||
*[[ | *'''[[Water Bottle|Garrafa de Água]]''' (uma garrafa com [[remoulade]] ou uma garrafa com [[Mayonnaise|maionese]] também pode ser esvaziada para ser usada como [[Water_Bottle|garrafa de água]] improvisada) | ||
*[[ | *'''[[Ripped Sheets|Pano rasgado]]''' (trata os [[Health|ferimentos]] do jogador, feitos de [[Sheet|lençóis]], [[Sweater|suéteres]], [[Skirt|saias]], [[Blouse|blusas]], [[Vest|coletes]], [[Pants|calças]], etc) | ||
*[[Skill Books|Livros de Habilidades]] (aumento passivo de XP para uma [[Skills|habilidade]]) | |||
*[[Hammer|Martelo]] (necessário para [[Carpentry|carpintaria]]) | |||
*[[Garbage Bag|Sacos de lixo]] (usado na [[Carpentry|carpintaria]], para fabricar [[Rain Collector Barrel|barris coletores de chuva]] obtendo água após parar de ser distribuída) | |||
*[[Lighter|Isqueiros]] ou [[Matches|fósforos]] (server para acender uma [[Campfire|fogueira]] com [[Campfire Materials|materiais de fogueira]] usando [[Fuel|combustível]] como [[Log|toras]], [[Plank|tábuas]], [[Book|livros]], [[Skill Books|livros de habilidades]], [[Newspaper|jornais]] e [[Magazine|revistas]] ou [[Molotov Cocktail|coquetéis molotov]]) | |||
*[[Nails|Pregos]] (servirá para [[Carpentry|carpintaria]]) | |||
*[[Farming#Seed_Packets|Pacotes de sementes]], como [[Potato Seeds Packet|batata]], [[Broccoli Seeds Packet|brócolis]], [[Cabbage Seeds Packet|repolho]], etc. | |||
*[[Trowel|Espátula]] ou [[Spade|Pá]] (servirá para [[Farming|Agricultura]]) | |||
*[[Adhesive Tape|Fita adesiva]], [[Duct Tape|Fita adesiva de tubo]], [[Glue|Cola]] e [[Wood Glue|Cola de madeira]] (necessário para [[Carpentry|carpintaria]] e [[Weapons|reparo de armas]]) | |||
*[[Beta Blockers|Calmantes]] ([[First_Aid#Medicine|remédio]] para diminuir seu nível de [[Panic|pânico]] ao longo do tempo ao lidar com encontros com zumbis.) | |||
*[[ValuTech PortaDisc|Leitor de CD]], [[Cordless Phone|Telefone sem fio]], [[Digital Watch|Relógio digital]], [[Earbuds|Fones de ouvido]], [[Headphones]], [[Home Alarm|Alarme doméstico]], [[Radio|Rádio]], [[Speaker|Caixa de som]], [[TV Remote|Controle remoto de TV]] e [[Video Game|Videogame]] (podem ser desmontados em peças de sucata eletrônica com uma [[Screwdriver|chave de fenda]] para aumentar o nível de [[Electrical|elétrica]] e fabricar outros eletrônicos) | |||
====Procurando armamento==== | |||
Com certeza, o item mais importante que você irá encontrar será sua arma inicial. O [[Baseball Bat|Taco de beisebol]] é a melhor escolha, embora as [[Frying Pan|frigideiras]] também são ideais para um início. [[Rolling Pin|Rolos de massa]], [[Shovel|pás]], [[Golf Club|tacos de golfe]], [[Crowbar|pés-de-cabra]] e [[Kitchen Knife|facas de cozinha]] podem ser usadas como armas em caso de emergência, embora as facas de cozinha sejam geralmente piores do que todas as outras listadas. [[Axe|Machados]] são ideais se você encontrar um, e se você tiver a sorte de encontrar um taco de beisebol, um [[Hammer|martelo]] e alguns [[Nails|pregos]], você poderá criar um [[Spiked Baseball Bat|taco de beisebol com pregos]] que servirá como uma arma digna por um longo tempo e pode ser facilmente consertado usando [[Wood Glue|cola de madeira]], [[Glue|cola]], [[Adhesive Tape|fita adesiva]], [[Duct Tape|fita adesiva de tubo ]] e [[Nails| pregos]]. | |||
Se você encontrar uma [[Pistol|Pistola]] e munição, provavelmente é melhor guardar em algum lugar ou marcar no mapa a localização com um [[Pencil|lápis]]. [[File:SurvivalGuide_ArmingYourself.png|thumb|Uma arma de fogo pode atrair zumbis em questão de segundos.]] Pistolas além de serem pesadas, fazem muito [[Noise|barulho]] e isso pode chamar atenção de zumbis. A partir da build 32, as armas de fogo foram bastante nerfadas, então você pode praticar e aumentar alguns níveis a mais de habilidade caso tiver tempo ou escolher alguma profissão que forneça mais [[Habilidades#Arma de Fogo|habilidades para apontar e recarregar armas]]. Para equipar quaisquer armas, coloque-as em seu inventário principal. Em seguida, clique com o botão direito do mouse no item e escolha a opção "Equipar na Mão Principal". Algumas armas podem ser seguradas com as duas mãos, porém precisará deixar nas costas ou guardar na mochila caso precise utilizar algum outro objeto nas mãos. | |||
====Armazenamento==== | |||
Agora que você tem muitos [[Items|itens]], um lugar para [[Storage|armazena-los]] é algo a considerar. Normalmente, uma cozinha tem alguns armários com muito espaço, uma geladeira, um [[Heat_Source#Oven|fogão]] e às vezes um [[Heat_Source#Microwave_Oven|micro-ondas]], essa área é uma forte candidata para a maioria de suas atividades iniciais. Também é possível carregar ainda mais peso, se necessário, usando [[School Bag|mochilas escolares]] e bolsas de caminhada ([[Normal Hiking Bag|normais]] ou [[Big Hiking Bag|grandes]]), e podem ser equipadas nas costas para liberar suas mãos. | |||
[[Plastic Bag|Sacos de plástico]] e [[Garbage Bag|sacos de lixo]] também se qualificam como alternativas se você precisar deslocar muito [[Heavy_Load|peso]] se colocada na mão secundária (lembrando que tudo que transportam coisas precisam estar equipadas para reduzir o peso dos objetos). Como mencionado acima, equipar uma arma em ambas as mãos o impossibilita de transportar qualquer coisa na sua mão secundária. Pode ser útil organizar os itens em categorias quando for armazená-los como [[Food#Perishable|alimentos perecíveis]] (geladeira), [[Food#Non-perishable|alimentos não perecíveis]], [[Cooking|utensílios de cozinha]], [[Items#Other_Tools|ferramentas]], [[Skill_Books|livros de habilidades]], [[Containers|recipientes vazios]], [[Water Dispenser|recipientes cheios]] (água), [[Farming|agricultura]], [[First Aid|remédios e curativos]], [[Weapons|armas e munições]], [[Plank|tábuas]], itens diversos, e lixo. | |||
====Permanecendo vivo==== | |||
Cuidar de si mesmo é importante, um [[Ripped Sheets|pano rasgado]] serve como atadura improvisada e pode ser feito rasgando roupas ou lençóis e são usados para parar o [[Bleeding|sangramento]] depois de se machucar. Você também precisará se [[Food|alimentar]] e beber [[Water|água]] para sobreviver. Se você estiver em um local seguro e seu personagem estiver com [[Thirst|sede]], beba um pouco de água. Você pode beber diretamente de [[Plumbing#Sinks|pias]] e [[Water Dispenser|bebedouros]] sem precisar de um recipiente, porém se você tiver algum recipiente de água em seu inventário ''principal'', você beberá a água automaticamente conforme necessário. | |||
| | |||
| | |||
| | |||
|'' | |||
Alimente-se sempre que sentir [[Hungry|fome]], especialmente antes do combate, e sempre coma [[Food#perishable|alimentos perecíveis]] primeiro. Os principais alimentos para consumo imediato são: [[pizza]], [[Pie|torta]] e [[Cake|bolo]]. Pois esses itens não podem ser usados para [[Cooking#Simple_Recipes|criar outras refeições]]. Caso contrário, coma alimentos perecíveis que restauram a menor quantidade de fome primeiro. [[Food#non-perishable|Alimentos não perecíveis]], como [[Chips|salgadinho]] e alimentos enlatados, como [[Canned Soup|sopa enlatada]] e [[Canned Beans|feijão enlatado]], são de baixa prioridade, porém devem ser armazenados, não consumidos, a menos que seja absolutamente necessário. | |||
Caso seu personagem ficar com [[Hungry|fome]], sua [[Habilidades#Passivas|força]] será reduzida com base no quão faminto ele está, isso pode criar problemas no combate corpo a corpo. [[Tired|Dormir]] também é importante. Tente dormir durante a noite para que sua visibilidade seja maximizada durante o dia quando você estiver se movimentando. O [[Tired|sono]] causa a redução da área de percepção, que pode levar você a ser emboscado inesperadamente por zumbis que estão bem ao seu lado. | |||
De vez em quando, seu personagem ficará com calor ou com frio. Tire ([[Hyperthermia|hipertermia]]) ou vista roupas ([[Hypothermia|hipotermia]]) quando souber disso. Uma [[Campfire|fogueira]] também serve, se você estiver desesperado. [[Hyperthermia|hipotermia]] ocorrerá com mais frequência no inverno, enquanto [[Hyperthermia|hipertermia]] ocorrerá mais durante o verão. A última coisa que você precisará é que seu personagem tenha hipotermia ou hipertermia em um apocalipse [[Zombie|zumbi]]. | |||
==== | ====Exploração==== | ||
[[ | Deixar seu esconderijo nunca é uma coisa segura a se fazer. Você nunca sabe quando terá a chance de voltar. Você deve ter uma ideia de para onde está indo e como pode voltar. É fácil se perder em [[Knox_Country|Knox]]. Evite florestas e estradas longas e largas como a rodovia. Caso for necessário, as florestas podem ser usadas para perder a linha de visão de uma horda. Sempre leve alguns [[Food|alimentos]] e [[Water_Bottle|garrafas de água]] ao sair, e não se esqueça de levar uma [[Weapons|arma]]. levar uma segunda arma caso aconteça alguma coisa é sempre bom, mas não obrigatório. Se você possuir uma [[Bags|mochila]], sempre coloque seus itens menos necessários nela e os itens essenciais no inventário primário. | ||
Lembre-se de tentar armazenar pelo menos uma semana de [[Food|alimentos]] e um par de [[Magazine|revistas]] e [[Book|livros]] para deixar em seu esconderijo, caso você fique [[ Doente|doente]] e tenha que ficar dentro de casa por um longo período de tempo para se recuperar. Outra dica para evitar de se perder, você poderá deixar um rastro de itens inúteis, como [[Fork|garfos]] ou [[Spoon|colheres]] no chão, principalmente em cruzamentos de estradas para mostrar o caminho de casa sem que precise abrir o mapa. Pegue um [[Pencil|lápis]] ou uma [[Pen|caneta]] para fazer anotações em seu mapa, assim facilitando a visualização (para apagar a marcação precisará de uma [[Eraser|borracha]]). | |||
====TV e Radio==== | |||
Durante os primeiros dias do apocalipse, o fornecimento de energia elétrica ainda está funcionando e as luzes ainda não se apagaram, graças a isso você poderá aproveitar o [[radio|rádio]] e transmissões de TV. A maioria dos canais fornecerá informações que podem ajudar a diminuir seu tédio. Então a '''dica de ouro''' para o começo do jogo é sintonizar no canal [[Life and Living TV]] que fornecerá níveis de experiências nas habilidades de culinária, carpintaria, pescaria ou sobrevivência. Com isso em mente, o melhor método de melhorar as habilidades de culinária, carpintaria, pescaria ou sobrevivência é achar e ler os [[Skill Books|livros de Habilidade]] primeiro antes de assistir as transmissões, assim você pode melhorar suas habilidades mais rapidamente antes que a emissora pare de transmitir. Apenas lembre-se de usar [[earbuds|fones de ouvido]] ou [[headphones]], mas se não tiver nenhum dos dois abaixe o volume e assista em um local seguro. | |||
Veja a programação completa da emissora clicando [[Life and Living TV|aqui]]. | |||
===Progredindo para um futuro=== | |||
Se você encontrou um [[Hammer|martelo]] e alguns [[Nails|pregos]], bloqueie todas as suas [[Window|janelas]] com o máximo de [[Plank|tábuas]] possível. Você pode pegar [[Plank|tábuas]] quebrando as [[Door|portas]] internas de uma casa ou derrubando árvores com um [[Axe|machado]] ou uma [[Pickaxe|picareta]]. Se você não conseguir encontrar nenhum dos itens citados, você poderá quebrar a porta usando um [[Golf Club|taco de golfe]], [[Frying Pan|frigideira]], ou um [[Hammer|martelo]]. Lembre-se que você precisa de uma [[Saw|serra]] para cortar o [[Log|tronco]], só assim terá suas [[Plank|tábuas]]. Tenha cuidado e certifique-se de explorar a área em busca de zumbis próximos antes de fazer qualquer tipo de [[Carpentry|construção]]! Eles serão atraídos pelo [[Noise|ruído]], e você pode acabar cercado dentro de seu esconderijo, ''e esse não parece ser o papel de um esconderijo''. | |||
Considere colocar [[Sheet Rope|cordas de lençol]] em todas as [[Window|janelas]] do andar de cima. Pois poderá acontecer um cerco de zumbis, e você ficará preso no segundo andar de sua casa com o primeiro andar repleto de zumbis. Subir ou descer em uma [[Sheet Rope|corda de lençol]], torna uma boa alternativa de saída ou entrada que os zumbis não podem usar. | |||
[[Window|Janelas]] são extremamente frágeis e fazem [[Noise|barulho]] quando quebram. [[Plank|Tábuas]] podem ser adicionadas na frente de uma [[Window|janela]] criando uma proteção para sua casa ou esconderijo. Você também pode considerar barricar [[Door|portas]] para que você tenha poucas portas, como uma porta principal, uma porta de trás e uma porta de emergência. Depois de fazer isso em todas as janelas do esconderijo, dê uma olhada na seção de [[Survival Guide#Barricading and Carpentry|Carpintaria e barricadas]] para ver como você pode melhorar seu esconderijo para torná-lo uma melhor fortaleza anti-zumbi. | |||
Você também pode usar uma [[Sledgehammer|marreta]] para destruir a escada para o segundo andar de um esconderijo, tornando-o inacessível para zumbis, apenas certifique-se de ter uma [[Sheet Rope|corda de lençol]] instalado em alguma janela. | |||
===Depois de muito tempo=== | |||
Semanas, talvez até meses se passaram depois que você começou. Sangue de zumbis e cadáveres se espalham pelas ruas apenas para refletir seus eficazes métodos de sobrevivência. Ao contrário da maioria das pessoas, você conseguiu sobreviver até aqui no jogo (parabéns! isso é um feito e tanto). Porém, é aqui que o jogo realmente começa. Esta fase é a sua transição de "sobrevivente" para "reconstrutor": você terá que começar a construir uma sociedade de apenas uma pessoa. (até o dia em que os NPCs chegarem no jogo) | |||
==Táticas== | |||
===[[Crafting|Construindo]]=== | |||
Com os recursos certos, jogadores podem juntar itens para criar novos itens ou melhoria de equipamentos. Clicando no item com o botão direito do mouse (com todos os itens da receita de fabricação presentes no inventário principal), os jogadores podem criar [[Crafting#Food|receitas de comida]], [[Crafting#Weapons|armas aprimoradas]] e [[Crafting#Construction|barricadas]] para reforçar seus esconderijos. Também é possível usar o menu de criação abaixo do ícone de status do personagem para criar itens, além de encontrar receitas ou melhorias facilmente. | |||
=== | ===[[Skills|Habilidades]]=== | ||
Para ver a habilidade de um personagem, abra a guia Habilidade depois de clicar no coração na interface do usuário (ou tecla de atalho 'L'). A tela "habilidades" aparecerá e mostrará quantos pontos de habilidade você tem, quais habilidades você desbloqueou e quão longe você está de desbloquear uma habilidade. As [[Skills|habilidades]] são niveladas automaticamente, quando você pratica a tal habilidade, por exemplo, você precisa que o nível de sua carpintaria seja 2 ou maior que isso para fazer um muro de troncos, e para aumentar seu nível de carpintaria, você poderá desmontar móveis ou construir coisas relacionadas a [[Carpentry|carpintaria]]. | |||
===Limpeza e armazenamento=== | |||
Você nunca terá suprimentos suficientes para durar a longo prazo, felizmente, existem vários lugares que você poderá saquear. Se você for cuidadoso, as explorações para coleta de suprimentos podem ser um pouco arriscadas, porém recompensadoras. | |||
[[File:Windowopening.png|thumb|Pressione uma vez a tecla "E" (por padrão) para abrir as janelas. Pressionar a mesma tecla segurando fará com que seu personagem suba pela janela aberta. Tocar na tecla uma vez enquanto estiver de frente para uma janela aberta irá fechá-la. Como alternativa, tocar na mesma tecla várias vezes enquanto ele tenta abri-la fará com que seu personagem quebre a janela (faça isso com alguma coisa nas mãos).]] | |||
=====Escolhendo um local===== | |||
Conheça o tipo de item que você está tentando encontrar. Se você precisar de suprimentos para construção ou agricultura, encontre um armazém ou loja de ferragens. Se você precisa de comida, casas e lojas provavelmente serão a melhor escolha. Antes de entrar no prédio, planeje sua estratégia de saída. Os suprimentos médicos podem ser encontrados em abundância em alguns dos principais depósitos médicos, com um em Muldraugh e dois em West Point. Tente certificar-se de que existem pelo menos dois pontos de entrada em lados diferentes do edifício, sejam janelas ou portas. Você quer ser capaz de escapar facilmente se os zumbis perceberem sua presença. Se você vir uma janela quebrada, tenha cuidado extra, pois isso pode ser causado por um zumbi que está dentro tentando sair, ou por um zumbi que está do lado de fora tentando entrar! | |||
=====Quebrando tudo===== | |||
Antes de entrar, é uma boa ideia dar uma olhada rápida ao redor do prédio apenas para ter certeza de que não há uma horda esperando você do outro lado. Tente também dar uma boa olhada pelas janelas, caso já haja zumbis lá dentro. Entrar por uma janela apenas para descobrir que você está entrando em uma sala cheia de zumbis não será uma boa surpresa! | |||
Sempre tente invadir o mais furtivamente possível, passando pelo lado do prédio com menos zumbis ao redor. Antes mesmo de tentar arrombar alguma coisa, verifique se alguma porta está destrancada. Se estiver bloqueado, você terá que entrar pela janela, basta mover para uma janela e pressionar E, e esperar até que ela abra. Se possível tente não quebrar as janelas, pois isso atrai zumbis. | |||
Depois de ter vasculhado e concluído que a sala está livre, feche a janela novamente, pois isso impedirá que qualquer zumbi que esteja te seguindo não surpreenda você. | |||
Alguns edifícios, como lojas, não terão janelas que podem ser abertas; neste caso, você terá que quebrar a janela. Para realizar isso basta bater sua arma corpo a corpo na janela como se fosse um zumbi, em seguida clique com o botão direito na janela e retire os vidros quebrados para não se cortar passando pela janela. Esteja preparado para correr e se esconder depois de fazer isso e não se esqueça de ficar de olho na janela para ver se algum zumbi é atraído. | |||
[[ | Ao entrar em qualquer edifício ou residência, há uma chance de que um [[Burglar Alarm|alarme de roubo]] soe. Isso atrairá rapidamente grandes quantidades de zumbis nessa área imediatamente. Fuja e tente se abrigar em outro lugar até que o alarme de roubo desapareça. Os alarmes contra roubo atrairão zumbis de longe, então tome cuidado para não se deparar com uma horda que está a caminho da casa. Os zumbis também podem passar 'através' das casas que estiverem no caminho, quebrando portas e janelas. | ||
Tente sempre correr de volta pelo caminho que você veio para a casa, pois você já sabe que essa rota é segura contra zumbis. E em casos extremos, tente correr para o leste, onde há menos zumbis (inferior direito ao desabilitar o modo isométrico do mapa). Uma boa tática para evitar zumbis nesses casos é encontrar um obstáculo paralelo à casa de alarme, como uma longa parede sem janelas ou uma cerca grande. À medida que os zumbis vão direto para a casa de alarme, eles terão que contornar esses grandes obstáculos, criando um lugar seguro para esperar. | |||
Desconfie de subir escadas em prédios, a menos que você tenha uma corda de lençol com você. Se os zumbis invadirem e você ficar preso no andar de cima, sua única saída será a janela, que tem uma grande chance de resultar em morte no acima do primeiro andar é morte certa. | |||
=====Fazendo a limpa===== | |||
A menos que você tenha explorado o prédio antes, nunca assuma que é seguro, seja por dentro ou por fora. Tente começar matando todos os zumbis que estão dentro. Pode ser perigoso lutar contra vários zumbis em espaços apertados e pequenos, se você precisar enfrentá-los, é melhor atraí-los para uma área tranquila e matá-los lá. Quando a entrada estiver liberada, feche todas as cortinas nas janelas e (se disponível) e adicione lençóis nas janelas que não tem cortinas ou persianas. | |||
Entre em cada sala com cuidado, tenha sua arma em mãos e pronta para o combate, quando abrir a porta dê um passo para trás imediatamente (solte Ctrl se estiver segurando, ou você atacará a porta caso clique com o botão esquerdo do mouse). Preste muita atenção aos sons de batidas. Quando você terminar de limpar o interior de um prédio, verifique se nenhum zumbi do lado de fora foi alertado sobre sua presença. Nunca corra enquanto estiver dentro de um prédio, a menos que esteja em perigo, pois correr cria barulho que atrai zumbis próximos. | |||
=====Localizações mais comuns de itens===== | |||
Certos itens são frequentemente encontrados em determinados contêineres, e esses tipos de contêiner tendem a ser encontrados em locais comuns. As casas, por exemplo, são bons locais para vasculhar, existem muitos alimentos e garrafas de água que são encontrados em geladeiras, utensílios de cozinha, sementes e alimentos não perecíveis são encontrados em armários de cozinha, livros e livros de habilidades são encontrados em prateleiras, remédios são encontrados nos armários de banheiro e bolsas são encontrados em guarda-roupas no quarto. Raramente haverá uma pistola e munição em qualquer um deles. | |||
=== | ==Reabastecendo o estoque== | ||
===Combate=== | |||
When heading out for a supply run, always be prepared. Only go outside during daylight, as you have better visibility during the day. Optionally, start your day by [[Well Fed|eating something]], refilling your [[Water Bottle]] and making sure you're not [[Encumbered|carrying too much]] before going out. Grab any weapon you can find in your base, preferably a good one like a Baseball Bat or Frying Pan. [[File:SurvivalGuide_BatBeatdownZomb.png|thumb|You'll automatically attack an incapacitated living zombie, keeping it from getting back up if you swing in its direction.]] | |||
When outside, try to walk as often as possible. If you ever stumble upon a horde, you'll be able to run and dodge them without being exhausted. Aside from being more quiet, walking will also save up some energy for fighting without getting [[exhausted]] too fast. Every now and then, keep your eyes over your shoulder, as you never know which zombies will follow you. Holding CTRL and circling the mouse around the character will make the player look in the mouse cursor's direction, giving you the ability to spot your enemy before they even see you. | |||
If you ever encounter a horde of zombies (more than five zombies), then the odds are against you. If you encounter such a large group of enemies, turn the other way. If you can't, try to sneak past them. But if the vast majority spotted you, run to your safe house (if it's safe and far away) or just to another destination. Try to run 3-10 corners so you can effectively lose the majority and make it much easier to fend off those who are still following you. | |||
About one to five zombies at once can effectively be dispatched by a Baseball Bat or an Axe (if fought one by one and carefully). When fighting groups, you should use hit-and-run tactics, as zombies do not have much of an attack range, and you can keep exhaustion at bay every 1-3 zombies you kill. Try to spread them out as much as possible by killing the faster ones first. Use the corners of buildings, open windows and open doorways to create bottlenecks to thin out groups. When fighting a group, don't try to immediately dispatch enemies you've knocked down when others are still coming. Instead, use the gap to line up your next attack on the next standing zombie. | |||
When fighting crawlers, try not to fight them from the front. Unless your attack kills a crawler in one hit, you '''will''' get injured (and possibly infected), as the crawler does not get stunned from non-fatal blows. Instead, run around it and go behind it. The crawler has to push its body around 180 degrees to get to you, so use its slow speed to your advantage. Do not attempt to fight against huge groups of zombies, since it would be a strenuous, long fight with time that could've been spent more productively. | |||
Never fight with a firearm unless you are sure that you have enough ammo to kill several times as many zombies as you expect to fight (since firearms will draw attention and are nerfed as of b32). Always shoot accurately, since ammo is quite scarce you will want each bullet to count. Try to fight away from your safehouse if you do fight with a firearm. Always be aware of your ammo situation, never fight until the absolute last bullet. Always keep a handful of extra rounds so that you can use them when you need to. Distance is your best friend, zombies cannot attack you if you aren't in arm's length and it gives you more time to reload before they approach you. Moving farther and farther away from your enemies will always help you keep a good distance away from them. | |||
Also, if you hear a helicopter, go indoors then approach the nearest window and wait for a zombie to run past. Depending on the direction it is travelling in, be sure to travel into the opposite direction or make adjustments to your route. This may not have any effect, if there are no zombies within several screens of your location in any given direction. If you are caught in the open for a moment with the helicopter, it will begin to follow you and lure zombies to you for a set amount of time. | |||
You are free to go anywhere you want, however, always try to plan where you're headed, what you'll be taking as loot and where you'll be settling in to make a safe-house. | |||
===Explorando mais áreas=== | |||
[[File:SurvivalGuide_Travel.png|thumb]] Eventually, you will want to get out of your area. Maybe it's because there are no more supplies left, or perhaps it's because you want to start anew somewhere far, far away from the horde, or you just want to reach the [[Well]]. When you know you will not be back home for a few days or moving out, always bring a week's worth of food and water with you. It's recommended to take the road, since you can easily get lost in the vast forest (forests can stretch several cells in all directions). A [[Tent]] may be needed to sleep in if your travels will prevent you from finding shelter before you reach your destination. [[Campfire Materials]] can compliment the tent nicely. Be sure you have [[Items#Fire Source|something]] to light the fire with. | |||
[[Vehicles]] are almost essential for long-distance travelling and hauling. Items can be stored in seats and the trunk, allowing for more objects to be brought along at a faster pace and not overexerting your character. Depending on the driver and type of vehicle that's being driven, extra items such as (but not limited to) [[Gas Can#Fuel|gas]], a [[Jack]], and a spare tire to maintain the vehicle. Don't assume that you're safe within your vehicle. You're at risk of getting into an accident that can either injure or kill your character. These risks are also abnormally increased with car wreckages of previous drivers because of the outbreak. Another effect of the car wreckages is that the vehicle will not be capable of being brought everywhere with you so if you want to continue past the car wreckages, it will have to be done by foot. Keep your eyes on the road, be aware of your surroundings, and be prepared to slam on the brakes if necessary. | |||
===== | ==Saúde== | ||
===[[Moodles|Humor]]=== | |||
Throughout your adventure, not only does your character gets hungry and thirsty but can also suffer from other conditions such as anxiety or depression. These status effects, called '''[[Moodles]]''', can be treated with varying methods from the use of [[consumables]] to just letting a wound heal depending on the character's need. For example, a [[bored]] character can be removed by reading a Book or a Magazine, and also moving about outside. The Moodles will also display signs of injuries, which requires first aid. | |||
==== | ====[[Endurance|Exaustão]] e [[Tired|Sono]]==== | ||
Eventualmente seu personagem irá começar a se sentir cansado. Você pode descansar ou dormir em cadeiras, sofás e camas. Se seu personagem está muito agitado, talvez ele precise de [[Sleeping Tablets|Pilulas de sono]] para dormir. Em grande parte dos servidores multiplayers, a opção de dormir é desabilitada. Você continuará ficando exuasto dos esforços, e você ainda poderá descansar em cadeiras e camas, mas não dormir, você nunca ficará sonolento. | |||
====[[Hungry|Fome]]==== | |||
Over time you will become hungry. The longer you go without food, the weaker you'll become before starvation starts to occur. Eating adequate amounts of edible food avoids that. Be sure to eat perishable foods first as they will expire in one way or another. Make sure to feed your character when they have no hunger-related Moodle, or at least when they're peckish. The hungrier they become, the more food it will take for them to feel satisfied, and the more weight they will loose. | |||
In contrast, overfeeding your character can temporarily make them stronger, carry more items, and gain a positive hunger-related Moodle. Remember that stuffing your character too much will cause them to gain weight and want more food over time. | |||
Portions of food can be fed to your character at a time to manage hunger better. For example, instead of eating whole watermelon, cut it or bash it to make slices or chunks. Then it can be eaten in 1/4, 1/2, or a whole slice or chunk. This can still fill your character up but without wasting so much food. If you're in early game and there's still tons of food lying around, you probably don't have to worry about perishable food conservation, as most of it will rot later anyways. | |||
When looting, remember to take non-perishables to your safe area. It's also a good idea to keep one or two of these in your inventory, just in case. | |||
To find food that isn't in buildings, go closer to or into the woods. Right click a ground tile and select Forage. Depending on your character's Foraging level, you can find things ranging from perishable [[Berry]] (Be careful with berries, though. All berry types stack, so take caution to avoid eating the white ones that will poison your character), and to non perishable [[Mushroom]]s, [[Foraging|insects]], [[Frog]]s, [[Stone]]s, [[Chipped Stone]]s, [[Twigs]], [[Tree Branch]]es, [[Worm]]s, Logs, and [[Egg|Wild Eggs]]. Foraging does tire out your character, though, so make sure the area is safe or you may find yourself exhausted and with a horde near you. | |||
Lastly, we have farming. To farm, you'll need various tools, seeds, and water. Plant your crops in a protected area, since zombies can trample and kill your plants. They can also hide in nearly grown crops and are difficult to see. If you wait until your crops are blooming, you can collect seeds, too. Don't wait too long or your crops will rot. | |||
=== | ====[[Thirst|Sede]]==== | ||
Your character gets thirstier faster than they can get hungry, so it's a good idea to have bottled water as soon as possible. If you can't find bottled water, you can improvise by filling up an [[Empty Bottle (disambiguation)|Empty Bottle]] up with water. Dehydration works similar to hunger. The thirstier your character becomes, the weaker they get. Currently, there's no positive-related thirst Moodle. | |||
Within months or weeks, the water supply will be cut off. You'll have some stockpiled water but that won't be nearly enough for you to live off of in the long term. One option is to find a Well, which will you give you an endless source of water. There are two known Wells, one is in a [http://pzmap.crash-override.net/#0.34375,0.12586309523809522,7.188178448582967 farm north of the city]. The second is located at a [http://pzmap.crash-override.net/#0.41017857142857145,0.15604166666666666,7.188178448582967 cabin in the woods], slightly closer to the city (almost directly Northeast of McCoy Lumber). If you want to get to one of the Wells, consider living in the farm, which is far away from zombies and has plenty of space for farming and construction. | |||
The best option is to create several [[Rain Collector Barrel]]s, which may be quite costly in terms of the resources that need to be used. Whenever it rains, these barrels will collect the water from the rain. Although one barrel will not give sufficient water for long-term survival, having many of these barrels will give you enough water to hydrate yourself as well as farm for food without having access to a well. As of build 31, water from these barrels will be tainted. This can make your character sick. | |||
You can collect and/or drink river water as well. It will also be tainted and require purifying like rain collector water to keep your character safe. | |||
To purify water collected from the river or Rain Collector Barrels, place down a Campfire with a Campfire Kit and put the water container in the Campfire inventory as you would cook something raw like a Chicken or an Egg. It should purify and be drinkable without any ill-effects once the green skull icon disappears from the water container. | |||
===[[Health|Tratamento de lesões]]=== | |||
[[File:SurvivalGuide_VariedTreatments2018.png|thumb|The Health Window]] | |||
There are many kinds of injuries that can happen so there are many treatments your character can do to perform on themselves. Keep in mind that you can be damaged by a zombie and not require any method shown below. Being patient and passing time is the best all-round treatment for any injury as long as it was dealt with properly. Good common items to have for treatment are [[Painkillers]], [[Bandage]]s, [[Antibiotics]], and a [[Bottle of Disinfectant]] or something with alcohol in it. If a bandage is needed, make sure to check on it frequently because it could turn dirty and the wound can be infected. | |||
Having a positive [[Hungry|Hunger Moodle]] quickens the recovery process of any injury, fights off infection, and generally makes your character more resilent to sickness in general. | |||
====Arranhões==== | |||
Scratches can happen from crawling through a broken window with no glass removed, climbing over barbed wire, vehicle collisions, or a zombie. If scratched by a zombie, there is a chance of being zombified albeit much smaller compared to being bitten. Disinfect and then bandage. | |||
====Feridas Profundas==== | |||
Common from climbing through windows and falling. It can also be caused from being hit with a heavy bladed weapon like an [[Axe]] or getting into a vehicle collision. First use a [[Suture Needle]] and then a [[Bandage]]. Optionally a [[Needle]] with [[Thread]] can be used as well but it causes more pain. If there's nothing to stitch up the wound with then applying a bandage will slow down its deterioration and bleeding (be aware that the bandage will become dirty faster). | |||
=== | =====Objetos alojados===== | ||
Bullets and glass shards can be lodged inside a deep wound. They must be removed to prevent complications as a result of stitching up the wound. They can be removed with fingers, but using [[Tweezers]] is a faster and less painful process. Then, disinfect the wound and deal with the deep wound appropriately. Leaving the object inside speeds up the rate and heightens the chance of the wound getting infected. Out of all the injuries, this is the most likely one to cause infection- particularly for the Deep Wound that it was lodged in. | |||
====Mordidas==== | |||
Zombies are the only source of bites. Out of all the injuries, this is the most efficient way to be zombified. Disinfect, bandage, and then pray. | |||
== | ====Queimaduras==== | ||
Usually caused from being lit on fire. Disinfect and then bandage. A burn follows a fracture in terms of the time it takes to fully heal. | |||
=== | ====Fraturas==== | ||
Fractures can happen from extreme vehicle collisions or jumping from a second-story building and higher. A [[Splint]] must be made for each fractured limb. Movement will be heavily restricted and even more so when wearing a Splint. Resting and sleeping a lot speeds up recovery. Avoid moving too much as well. Out of all the injuries, a fracture takes the longest to heal back up. Once every week after the first week, take off the Splints to see if the fractures are still there. If so, then simply reapply without moving. | |||
Disinfecting isn't necessary for survival, but it prevents infection. Infection makes the affected area in a worse condition and has greater negative impact on your health. | |||
===Morte=== | |||
=== | |||
[[File:ded.png|thumb]] | [[File:ded.png|thumb]] | ||
Depending on how your character dies, they have a chance to emit loud screams of agony which can attract zombies. One of two possible outcomes will happen to your character when they die. | |||
====Cadáver==== | |||
This is just a regular and normal death. It happens when you fall from a great height, being killed by another player, or bleeding out from being cut on a window. Your character's corpse will be lootable and contain everything in it while they were alive with the exception of what they had in their hands. The items in those hands will be scattered about on the floor around them instead. | |||
====Zumbificação==== | |||
The most common process that occurs after death. After keeling over, soon they will get up as a zombie with a [[Zombie|Zombified Moodle]]. They can't be controlled by the player, and they behave like a normal zombie. Note that they still keep everything they had on them when they were alive. Zombification happens faster if they bleed out shortly after being scratched or bitten by a zombie even if they technically wouldn't have succumbed to it. Interestingly, the zombified character doesn't drop what they had in their hands while they were alive unlike a normal death. | |||
==Habilidades== | |||
===[[Cooking|Culinária]]=== | |||
Cooking is a skill that allows the player to craft food recipes that restore much more hunger, and/or boredom and unhappiness. It also determines the likelihood of burning certain food items, such as meat. Those foods usually have an Uncooked or Raw prefix in front of their name. As of build 30, Cooking level seven allows the player to use rotten ingredients in some recipes. Cooking can be done on any heat source, from a [[Heat Source#Campfire|campfire]] to an [[Heat Source#Oven|oven]]. | |||
== | ===[[Carpentry|Carpintaria]]=== | ||
[[File:Fort.png|thumb|Logs are an efficient source of Planks, provided you can find a [[Saw]].]] | |||
In a zombie apocalypse, nowhere is safe. However, that can't stop you from [[Barricade|fortifying]] a safe-house of your interest. Some buildings are safer than others. A two-story house with multiple doors and few windows is recommended. In case of an home invasion, you can always escape through a window using a Sheet Rope. For maximum protection and stealth, board up every window with Planks and Sheets. | |||
Carpenters equipped with a Sledgehammer can destroy walls, doors, and window frames to get rid of them. Materials are rarely yielded from destroying rather than disassembling. | |||
If you run out of Planks, you can use an Axe to chop down doors. Chopping down doors will yield one to two wooden planks, along with [[Door Hinge|Door hinges]] and [[Doorknob]]s. Another alternative is to chop down trees. Taking down a tree will yield one to five Logs. You can then use a Saw to craft Logs into Planks. | |||
Later in the game, once you have the tools and resources for larger constructions, you should think about the use of wall pieces. A perimeter wall will prevent zombies from seeing you in your house and will muffle sounds further. Furthermore, you will have more time to escape should your safehouse be invaded. A perimeter fence (any material) can be used to slow down zombies during an invasion. If you have the time and resources, you can make makeshift structures. | |||
Please take note that constructing a safe-house will make a lot of noise, which will draw any stragglers nearby. Carpentry jobs should be done during the day and when the outside is relatively quiet and zombie-free. | |||
===[[Farming|Agricultura]]=== | |||
[[Farming|agricultura]] é essencial para o fim do jogo porque a eletricidade eventualmente vai acabar e você será forçado a comer comida não perecível, não é qualquer área exatamente que é abundante em Muldraugh. | |||
===[[Fishing|Pescaria]]=== | |||
Pescar é outra forma alternativa de recursos de comida. Para isso, você precisa de uma [[Fishing Rod|vara de pesca]] e [[Bait|isca]]. | |||
===[[Trapping|Caça]]=== | |||
Caçar é uma forma de coleta de comida. O jogador pode caçar animais pequenos e usá-los como alimentos. Você vai precisar construir armadilhas (requer qualquer livros de habilidades especiais, além de armadilhas de rato), e use iscas (tal como [[Carrot|cenouras]] ou [[Cabbage|repolhos]]) assim coloque a isca na armadilha para ter a captura com sucesso. Tábuas,pregos e [[Twine|fios]] são os tipos de matérias mais comuns para armadilhas. | |||
=== | |||
[[ | |||
=== | ===[[Foraging|Sobrevivência]]=== | ||
Some areas can be foraged in, such as the woods surrounding buildings. Right click on the ground and the Forage option may appear while the progress bar fills. If it does not. look elsewhere near the area you're in or move closer to nearby woods, but be cautious because of hiding zombies in cover. | |||
Depending on your characters Foraging skill, you may find edible plants, or building materials like twigs, branches, rocks, etc. Basic shoddy tools can be crafted with these foraged materials if you need a Hammer or Axe in a pinch, but they are not durable. | |||
== | ==Mundo== | ||
=== | ===Mapa=== | ||
[[File:Reference_onecell.png|left|thumb|700px|One black square is one cell which contains 300x300 tiles.]] | |||
It is a bit of an understatement when people say the map is huge. Since it's well...huge! | |||
To give you an idea of just how big the map is, here are some figures courtesy of harakka and blindcoder. The map is 20x20 cells + another 12x6 cells. Each of those cells contains about 300x300 tiles. Now some of you will be going "But of course, my good lad!" others will be going "It doesn't sound that big." | |||
To give you an idea of just how big the map is, here are some figures courtesy of harakka and | |||
Here's a picture to show you how big '''one''' cell is. Each black square is roughly the size of one cell. | Here's a picture to show you how big '''one''' cell is. Each black square is roughly the size of one cell. | ||
Hopefully that puts things into perspective. Now, the place is huge and it's easy to get lost, so if you would like a helping hand in navigating the map, then you can go check out this [http://pzmap.crash-override.net/ Knox County map], it can be especially useful for new survivors as players have marked points of interest. These can include where a decently supplied place is, good fortification locations, to everything your heart desires. So, remember to give it a look if you want. | Hopefully that puts things into perspective. Now, the place is huge and it's easy to get lost, so if you would like a helping hand in navigating the map, then you can go check out this [http://pzmap.crash-override.net/ Knox County map], it can be especially useful for new survivors as players have marked points of interest. These can include where a decently supplied place is, good fortification locations, to everything your heart desires. So, remember to give it a look if you want. | ||
If you find some odd anomaly around the map, such as a place you can't enter but seemingly could, invisible walls, etc, then you might want to get check out [http://theindiestone.com/forums/index.php/topic/34-map-specific-problems/|this forum thread]. | If you find some odd anomaly around the map, such as a place you can't enter but seemingly could, invisible walls, etc, then you might want to get check out [http://theindiestone.com/forums/index.php/topic/34-map-specific-problems/|this forum thread]. | ||
Report the problem, so that the developers can fix it! | Report the problem, so that the developers can fix it! | ||
It's incredibly important to report bugs! | It's incredibly important to report bugs! | ||
=== | ===Temperatura=== | ||
A temperatura irá mudar de acordo com as temporadas. Vestir menos roupas de frio durante um dia quente de verão, ou colocar agasalho quando se aproxima uma noite fria cair. Durante o inverno você vai precisar de mais roupas quentes. Fogueira ou outros recursos de calor vão manter você quente. | |||
=== | ===Luz=== | ||
Luz pode fazer ficar mais fácil de enxergar enquanto está coletando, mas mesmo com mais acesso você provavelmente vai alertar zombies (especialmente a noite). Luzes em construções podem ser desligadas geralmente.[[Flashlight|Lanterna]]s são um recurso portável para carregar na mão, mas ela requer [[Battery|Bateria]] para opera-lo. [[Lamp on Pillar]]s pode ser construído para adicionar luz ao jogador fazer estruturas. | |||
=== | ===Clima=== | ||
{{See|Weather}} | |||
A chuva pode cair aleatoriamente. Andando ao ar livre na chuva fará seu personagem ficar úmido. Depois de um tempo na chuva você vai ficar encharcado e tem a chance de pegar um resfriado. Uma vez fora da chuva, você vai secar devagar. Você pode acelerar o processo com uma [[Bath Towel|Toalha]], geralmente encontrada nos armários do banheiro. | |||
''' | ===Eventos=== | ||
'''Entre o primeiro dia e 2 meses depois da criação do mundo,a água encanada acaba.''' | |||
O jogador não será mais possível beber água das pias da cozinha,pias de banheiro, ou usar vaso sanitário, e ele/ela não poderá mais encher garrafinhas de água.Depois deste acontecimento, recursos de água serão bem escassos nas residências(garrafinhas de água ou uma panela) não terão mais essa função.A partir desse ponto,o jogador deve continuar se movendo para para conseguir sobreviver com a pouca água que resta das torneiras,mas ele pode construir um coletor de água de barril. | |||
''' | '''Entre o primeiro dia e 2 meses depois da criação do mundo, a energia elétrica acaba.''' | ||
As geladeiras e as lâmpadas não vão mais ligar. Você não vai poder cozinhar, exceto com uma fogueira ou churrasqueira. Muito em breve, todas as comidas perecíveis vão estragar e você terá que sobreviver de comidas não perecíveis ou também pode fazer [[farming|cultivo]], [[fishing|pesca]], [[foraging|caça]], ou [[trapping|armadilhas]] para conseguir sua própria comida. | |||
'''Meta-Game | '''Meta-Game Eventos''' | ||
Recentemente há dois tipos de [[Metagame|eventos aleatórios]] que acontecem pelo jogo. Às vezes os jogadores conseguem ouvir barulhos de tiros ou helicópteros. Os dois têm a mesma função de imigração em massa da população de zumbis e não venha para qualquer lugar atual com recursos. Quando você escutar eles,fique alerta das mudanças das posições e movimentações dos zombies. | |||
<br /> | <br /> | ||
== | ==Dicas e truques== | ||
Here are a few things to always be wary of while playing the game. Being mindful of these things will help you survive longer in Knox County. | Here are a few things to always be wary of while playing the game. Being mindful of these things will help you survive longer in Knox County. | ||
* | *You can only see where you're looking towards. Watch your back. | ||
* | *Beware of keeping [[Alarm Clock]]s or [[Digital Watch]]es! They may have an alarm already set on when you pick them up. Be sure to disable them so you don't unknowingly become a walking dinner bell. | ||
* | *While you have running water, fill extra containers with water (mugs, pans, buckets, spare water bottles etc) and stockpile them. When the water is shut off you'll still have some water to spare that won't need purifying. | ||
* | *Being out in the open is a double-edged sword. There's little cover, meaning there's a high possibility of zombies noticing you. | ||
* | *Until you have searched the entire building, consider it a dangerous location. Once you know it's empty, start closing curtains and any outside doors and windows for some privacy. After that, start looting. | ||
*Know when to commit to a fight. If fighting, make sure it's extremely imbalanced to your favor. | |||
* | *Jumping off from the second floor should only be a last resort. Any higher than the second floor though, you will die. | ||
*Be indoors by 8-9 PM and be sleeping at 10-11 PM. Visibility thanks to the sun will make surviving easier. | |||
* | *Bandages are a life saver. You should always take some with you just in case. Ideally, make them from spare clothes using the "rip sheets" menu command. | ||
* | *Inspect corpses. They can have interesting items or keys to either buildings or vehicles. | ||
*When you | *When you're scavenging and have some space left, take a few items you think you won't need for now. They might be useful later on. | ||
* | *Moving while sneaking can earn you a very small stream of constant experience. More experience is earned if sneaking around zombies that aren't alerted to your presence. | ||
*If you have friends and a vehicle in the apocalypse, it's recommended to carpool with them. Not only will it save gas by having only one vehicle at a time, it'll generate less noise compared to having each friend have their own vehicle. | |||
*Before opening a door listen for any sounds like footsteps, banging, groans, bags unzipping, or struggling. They will give you clues on who and what could be on the other side. | |||
*At the very beginning, there will never be a zombie in the building you spawn in. Of course, that doesn't mean it's invulnerable to zombies walking inside it later! | |||
*If you manage to find car in relatively good condition and enough gas, you should consider establishing your safehouse in rural area, as it is less dangerous. | |||
== | ==Veja também== | ||
* [[Controls]] | * [[Controls]] | ||
* [[ | * [[Knox Country]] | ||
* [[Crafting]] | * [[Crafting]] | ||
* [[Moodles]] | * [[Moodles]] | ||
| Line 361: | Line 359: | ||
* [[Profession]] | * [[Profession]] | ||
* [[Player]] | * [[Player]] | ||
* [[Hydrocraft Guide]] | |||
[[Category:Gameplay]] | [[Category:Gameplay/pt-br]] | ||
[[Category:Guides]] | [[Category:Guides/pt-br]] | ||
Latest revision as of 12:04, 25 April 2024

|
| Spiffo é o verdadeiro sobrevivente. |
|---|
Introdução
Prefácio
Bem vindo ao Guia de Sobrevivência para iniciantes. Este guia irá cobrir alguns tópicos relacionados ao Project Zomboid, e é dirigido a novos jogadores, apesar de também poder ser usado por jogadores veteranos para atualização ou como referência. Este guia irá ensinar aos jogadores o básico da sobrevivência, combate e exploração. Este guia é voltado para o modo Sobrevivente.
Embora o guia tenha sido criado para ser lido por inteiro, cada sessão pode ser lida independentemente, isso permite ao leitor pular para partes que o interessa, pois há múltiplas formas de jogar Project Zomboid. Se você quer ter uma experiência autêntica (sem influência deste guia), recomendamos que tente jogar sem esse guia primeiro, e caso tenha dificuldades pode voltar e fazer uma leitura nos tópicos.
Interface

Esta é a interface do Project Zomboid na versão mais recente. Os elementos foram destacados na imagem à direita, confira a legenda:
1) Personagem do jogador (Você!)
2) Equipamento primário, normalmente para Armas e ferramentas
3) Equipamento secundário, geralmente serve para carregar coisas de uso indireto (sacolas plásticas, saco de lixo, mochila de viagem, etc.) ou para algumas armas grandes que necessitam as duas mãos.
4) Menu de inventário
5) Menu de status do personagem
6) Menu de fabricação
7) Menu de móveis, para mover, girar e pegar móveis e itens maiores
8) Modo de procura é uma habilidade de sobrevivência que permite procurar por alimentos e recursos em qualquer área.
9) O Mapa é usado para navegar pelas cidades em Knox Country.
10) Hora atual. Exibido apenas ao transportar um dispositivo que mostra a hora (O Relógio Digital é bem comum de se achar em zumbis mortos)
11) Controle de tempo, serve para acelerar ou pausar o tempo no modo de jogo Solo.
12) Humores, que mostra quaisquer modificador de humor de seu personagem
13) A Hotbar é uma barra de seleção onde o jogador armazena e seleciona as armas ou objetos mais usados, os itens ficam visíveis nas costas ou no cinto.
Controle e gestão de inventario
Algumas funcionalidades da interface passam despercebidas...
1) Itens do inventário podem ser agrupados ao segurar o botão esquerdo e arrastar o cursor realçando os itens desejados.
2) Itens individuais também podem ser agrupados, segurando a tecla CTRL enquanto seleciona os itens desejados.
3) Itens podem ser movidos e largados em novos recipientes ou no chão ao soltar o botão esquerdo fora da janela existente.

Arrastando

CTRL + clique
Botão de Pegar tudo


Criação de Personagem

Assim que você inicia um novo jogo, e escolhe o mapa desejado, inicia-se a criação do personagem. Para acessar o guia de criação do personagem, visite a página Jogador. Este guia mostra todas as telas que serão encontradas até o início do jogo, explicando os Atributos e benefícios para as variadas profissões.
Entretanto, entenda: A morte é inevitável. Nas primeiras vezes que você for jogar, provavelmente se encontrará em situações desconfortáveis, onde não terá escapatória. Isso acontece às vezes. Não é porque você é ruim, acontece apenas porque você é um novato. Com o tempo você aprende, a cada partida você ganha mais experiência e vai melhorando, para futuramente jogar com outros personagens e sobreviver por mais tempo.
Quando você cria um personagem, e dá a ele atributos, você vai moldando a sua personalidade, abaixo há exemplos de personalidades formadas, mas primeiro uma breve discussão sobre os atributos e você vai poder entender o motivo de alguns atributos não aparecem para a escolha. Atualmente o jogo encontra-se incompleto, e por isso alguns atributos requerem equilíbrio, ou seja, o atributo contrário em alguns casos não foi implementado ainda, porém, futuramente vários atributos estarão disponíveis.
Exemplos de personalidades negativas fáceis: Covarde, Pacifista, Semi-analfabeto, Comilão e Sedento.
Covarde e Pacifista não tem muito impacto negativo, pois você deve fugir dos zumbis em vez de tentar combatê-los desde o início, até adquirir um Bastão de Beisebol, Machado ou uma fogueira (Materiais da Fogueira). Semi-analfabeto não tem nenhum efeito "negativo", por si só, já que na verdade não diminui nenhuma habilidade. É apenas uma perda de tempo, pois a leitura leva mais tempo do que o normal, mas não é um problema, desde que você tenha certeza de que está seguro antes de começar a ler. Comilão e Sedento também não são difíceis de equilibrar, pois você precisará comer e beber um pouco mais, então fica fácil caso mantenha uma boa administração e um suprimento constante de comida e água disponível.
Dorminhoco e Acima do peso são mais difíceis até certo ponto, mas ainda sim vale a pena. Embora o excesso de peso reduza sua habilidade inicial de condicionamento físico em dois pontos inicialmente, ela pode ser equilibrada se você tiver o hábito de correr, e o condicionamento físico pode subir acima do normal se você sobreviver por tempo suficiente. Dorminhoco se aplica no mesmo sentido do Semi-analfabeto, pois você precisará dormir mais, então você só precisa ter certeza de que está seguro antes de dormir.
| Exemplos de personalidades | ||||
 |
 |
 | ||
Evolução do jogo
Primeiros passos
O início de sua aventura pode ser a parte mais difícil do jogo. Se você é um novo jogador, você vai poder ler e jogar o tutorial completo para se acostumar com o básico do jogo, como se movimentar, abrir contêineres e como funciona o combate.
O que fazer
Em Project Zomboid você começa em uma casa ou trailer. Seus primeiros objetivos são achar armas, alimentos e uma mochila. Caso você queira ficar na casa onde começou e fazer um esconderijo, certifique-se de que as janelas do primeiro andar tenham cortinas. Se não tiver, tente procurar em armários e quartos por alguns lençóis pois eles podem ser transformados em cortinas. Se você não conseguir encontrar lençóis suficientes e vir um algum zumbi por fora da janela; não entre em pânico, seja cauteloso. Eles não vão notar você desde que você fique longe da janela e não faça barulho, não corra, grite e nem tente bater em alguma coisa com sua arma seja ela qual for. Desligar as luzes em sua casa também aumentará suas chances de não ser visto. As luzes podem ser ligadas ou desligadas clicando em um interruptor de luz na parede se seu personagem estiver perto o suficiente.
Às vezes você pode ser visto por zumbis. Se eles estiverem se aproximando, fuja e perca a linha de visão. Isso pode ser feito entrando em um prédio ou casa, fechando a porta por onde entrou e saindo pelos fundos (por exemplo). Então tente encontrar um esconderijo melhor ou, se puder, chame a atenção de zumbis próximos e leve-os para longe de sua área, apenas para tornar as coisas um pouco mais seguras. Caso contrário, você pode ficar uma ou duas noites se tiver cortinas suficientes no térreo, desde que fique quieto e não faça muito barulho. No entanto, tenha em mente que pode haver o risco de Zumbis invadirem seu esconderijo com ruído de helicóptero ou eventos de som ambiente como tiros e gritos. O helicóptero aparecerá no máximo duas vezes no primeiro mês, normalmente no final da primeira semana. Mas isso pode ser ignorado se você encontrar um rádio com a estação de rádio Automated Emergency Broadcast System (AEBS), pois isso irá informá-lo quando o helicóptero virá, dizendo 'Atividade Aérea Detectada'.
Coletar alimentos também é uma prioridade (coma os perecíveis primeiro, e guarde os não-perecíveis para mais tarde, a menos que você esteja com muita fome), assim como coletar e encher algumas canecas vazias e panelas com água, guardando-as para quando a energia elétrica e a água pararem de serem distribuídas. A energia elétrica e a água podem ser desligadas em qualquer lugar de um a dois dias a partir do primeiro dia (se você for realmente azarado) ou normalmente em 1 mês. (Este tempo pode ser alterado nas configurações do sandbox).
Esta lista é um exemplo do que saquear em prioridades (negrito é essencial):
- Mochila (quanto mais capacidade e redução de peso, melhor é a mochila! A melhor mochila é a Mochila Militar)
- Armas (taco de beisebol, frigideira, rolo de massa ou taco de golfe servirá muito bem no começo)
- Garrafa de Água (uma garrafa com remoulade ou uma garrafa com maionese também pode ser esvaziada para ser usada como garrafa de água improvisada)
- Pano rasgado (trata os ferimentos do jogador, feitos de lençóis, suéteres, saias, blusas, coletes, calças, etc)
- Livros de Habilidades (aumento passivo de XP para uma habilidade)
- Martelo (necessário para carpintaria)
- Sacos de lixo (usado na carpintaria, para fabricar barris coletores de chuva obtendo água após parar de ser distribuída)
- Isqueiros ou fósforos (server para acender uma fogueira com materiais de fogueira usando combustível como toras, tábuas, livros, livros de habilidades, jornais e revistas ou coquetéis molotov)
- Pregos (servirá para carpintaria)
- Pacotes de sementes, como batata, brócolis, repolho, etc.
- Espátula ou Pá (servirá para Agricultura)
- Fita adesiva, Fita adesiva de tubo, Cola e Cola de madeira (necessário para carpintaria e reparo de armas)
- Calmantes (remédio para diminuir seu nível de pânico ao longo do tempo ao lidar com encontros com zumbis.)
- Leitor de CD, Telefone sem fio, Relógio digital, Fones de ouvido, Headphones, Alarme doméstico, Rádio, Caixa de som, Controle remoto de TV e Videogame (podem ser desmontados em peças de sucata eletrônica com uma chave de fenda para aumentar o nível de elétrica e fabricar outros eletrônicos)
Procurando armamento
Com certeza, o item mais importante que você irá encontrar será sua arma inicial. O Taco de beisebol é a melhor escolha, embora as frigideiras também são ideais para um início. Rolos de massa, pás, tacos de golfe, pés-de-cabra e facas de cozinha podem ser usadas como armas em caso de emergência, embora as facas de cozinha sejam geralmente piores do que todas as outras listadas. Machados são ideais se você encontrar um, e se você tiver a sorte de encontrar um taco de beisebol, um martelo e alguns pregos, você poderá criar um taco de beisebol com pregos que servirá como uma arma digna por um longo tempo e pode ser facilmente consertado usando cola de madeira, cola, fita adesiva, fita adesiva de tubo e pregos.
Se você encontrar uma Pistola e munição, provavelmente é melhor guardar em algum lugar ou marcar no mapa a localização com um lápis.

Pistolas além de serem pesadas, fazem muito barulho e isso pode chamar atenção de zumbis. A partir da build 32, as armas de fogo foram bastante nerfadas, então você pode praticar e aumentar alguns níveis a mais de habilidade caso tiver tempo ou escolher alguma profissão que forneça mais habilidades para apontar e recarregar armas. Para equipar quaisquer armas, coloque-as em seu inventário principal. Em seguida, clique com o botão direito do mouse no item e escolha a opção "Equipar na Mão Principal". Algumas armas podem ser seguradas com as duas mãos, porém precisará deixar nas costas ou guardar na mochila caso precise utilizar algum outro objeto nas mãos.
Armazenamento
Agora que você tem muitos itens, um lugar para armazena-los é algo a considerar. Normalmente, uma cozinha tem alguns armários com muito espaço, uma geladeira, um fogão e às vezes um micro-ondas, essa área é uma forte candidata para a maioria de suas atividades iniciais. Também é possível carregar ainda mais peso, se necessário, usando mochilas escolares e bolsas de caminhada (normais ou grandes), e podem ser equipadas nas costas para liberar suas mãos.
Sacos de plástico e sacos de lixo também se qualificam como alternativas se você precisar deslocar muito peso se colocada na mão secundária (lembrando que tudo que transportam coisas precisam estar equipadas para reduzir o peso dos objetos). Como mencionado acima, equipar uma arma em ambas as mãos o impossibilita de transportar qualquer coisa na sua mão secundária. Pode ser útil organizar os itens em categorias quando for armazená-los como alimentos perecíveis (geladeira), alimentos não perecíveis, utensílios de cozinha, ferramentas, livros de habilidades, recipientes vazios, recipientes cheios (água), agricultura, remédios e curativos, armas e munições, tábuas, itens diversos, e lixo.
Permanecendo vivo
Cuidar de si mesmo é importante, um pano rasgado serve como atadura improvisada e pode ser feito rasgando roupas ou lençóis e são usados para parar o sangramento depois de se machucar. Você também precisará se alimentar e beber água para sobreviver. Se você estiver em um local seguro e seu personagem estiver com sede, beba um pouco de água. Você pode beber diretamente de pias e bebedouros sem precisar de um recipiente, porém se você tiver algum recipiente de água em seu inventário principal, você beberá a água automaticamente conforme necessário.
Alimente-se sempre que sentir fome, especialmente antes do combate, e sempre coma alimentos perecíveis primeiro. Os principais alimentos para consumo imediato são: pizza, torta e bolo. Pois esses itens não podem ser usados para criar outras refeições. Caso contrário, coma alimentos perecíveis que restauram a menor quantidade de fome primeiro. Alimentos não perecíveis, como salgadinho e alimentos enlatados, como sopa enlatada e feijão enlatado, são de baixa prioridade, porém devem ser armazenados, não consumidos, a menos que seja absolutamente necessário.
Caso seu personagem ficar com fome, sua força será reduzida com base no quão faminto ele está, isso pode criar problemas no combate corpo a corpo. Dormir também é importante. Tente dormir durante a noite para que sua visibilidade seja maximizada durante o dia quando você estiver se movimentando. O sono causa a redução da área de percepção, que pode levar você a ser emboscado inesperadamente por zumbis que estão bem ao seu lado.
De vez em quando, seu personagem ficará com calor ou com frio. Tire (hipertermia) ou vista roupas (hipotermia) quando souber disso. Uma fogueira também serve, se você estiver desesperado. hipotermia ocorrerá com mais frequência no inverno, enquanto hipertermia ocorrerá mais durante o verão. A última coisa que você precisará é que seu personagem tenha hipotermia ou hipertermia em um apocalipse zumbi.
Exploração
Deixar seu esconderijo nunca é uma coisa segura a se fazer. Você nunca sabe quando terá a chance de voltar. Você deve ter uma ideia de para onde está indo e como pode voltar. É fácil se perder em Knox. Evite florestas e estradas longas e largas como a rodovia. Caso for necessário, as florestas podem ser usadas para perder a linha de visão de uma horda. Sempre leve alguns alimentos e garrafas de água ao sair, e não se esqueça de levar uma arma. levar uma segunda arma caso aconteça alguma coisa é sempre bom, mas não obrigatório. Se você possuir uma mochila, sempre coloque seus itens menos necessários nela e os itens essenciais no inventário primário.
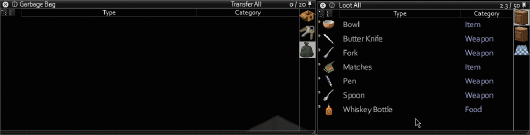
Lembre-se de tentar armazenar pelo menos uma semana de alimentos e um par de revistas e livros para deixar em seu esconderijo, caso você fique doente e tenha que ficar dentro de casa por um longo período de tempo para se recuperar. Outra dica para evitar de se perder, você poderá deixar um rastro de itens inúteis, como garfos ou colheres no chão, principalmente em cruzamentos de estradas para mostrar o caminho de casa sem que precise abrir o mapa. Pegue um lápis ou uma caneta para fazer anotações em seu mapa, assim facilitando a visualização (para apagar a marcação precisará de uma borracha).
TV e Radio
Durante os primeiros dias do apocalipse, o fornecimento de energia elétrica ainda está funcionando e as luzes ainda não se apagaram, graças a isso você poderá aproveitar o rádio e transmissões de TV. A maioria dos canais fornecerá informações que podem ajudar a diminuir seu tédio. Então a dica de ouro para o começo do jogo é sintonizar no canal Life and Living TV que fornecerá níveis de experiências nas habilidades de culinária, carpintaria, pescaria ou sobrevivência. Com isso em mente, o melhor método de melhorar as habilidades de culinária, carpintaria, pescaria ou sobrevivência é achar e ler os livros de Habilidade primeiro antes de assistir as transmissões, assim você pode melhorar suas habilidades mais rapidamente antes que a emissora pare de transmitir. Apenas lembre-se de usar fones de ouvido ou headphones, mas se não tiver nenhum dos dois abaixe o volume e assista em um local seguro. Veja a programação completa da emissora clicando aqui.
Progredindo para um futuro
Se você encontrou um martelo e alguns pregos, bloqueie todas as suas janelas com o máximo de tábuas possível. Você pode pegar tábuas quebrando as portas internas de uma casa ou derrubando árvores com um machado ou uma picareta. Se você não conseguir encontrar nenhum dos itens citados, você poderá quebrar a porta usando um taco de golfe, frigideira, ou um martelo. Lembre-se que você precisa de uma serra para cortar o tronco, só assim terá suas tábuas. Tenha cuidado e certifique-se de explorar a área em busca de zumbis próximos antes de fazer qualquer tipo de construção! Eles serão atraídos pelo ruído, e você pode acabar cercado dentro de seu esconderijo, e esse não parece ser o papel de um esconderijo.
Considere colocar cordas de lençol em todas as janelas do andar de cima. Pois poderá acontecer um cerco de zumbis, e você ficará preso no segundo andar de sua casa com o primeiro andar repleto de zumbis. Subir ou descer em uma corda de lençol, torna uma boa alternativa de saída ou entrada que os zumbis não podem usar.
Janelas são extremamente frágeis e fazem barulho quando quebram. Tábuas podem ser adicionadas na frente de uma janela criando uma proteção para sua casa ou esconderijo. Você também pode considerar barricar portas para que você tenha poucas portas, como uma porta principal, uma porta de trás e uma porta de emergência. Depois de fazer isso em todas as janelas do esconderijo, dê uma olhada na seção de Carpintaria e barricadas para ver como você pode melhorar seu esconderijo para torná-lo uma melhor fortaleza anti-zumbi.
Você também pode usar uma marreta para destruir a escada para o segundo andar de um esconderijo, tornando-o inacessível para zumbis, apenas certifique-se de ter uma corda de lençol instalado em alguma janela.
Depois de muito tempo
Semanas, talvez até meses se passaram depois que você começou. Sangue de zumbis e cadáveres se espalham pelas ruas apenas para refletir seus eficazes métodos de sobrevivência. Ao contrário da maioria das pessoas, você conseguiu sobreviver até aqui no jogo (parabéns! isso é um feito e tanto). Porém, é aqui que o jogo realmente começa. Esta fase é a sua transição de "sobrevivente" para "reconstrutor": você terá que começar a construir uma sociedade de apenas uma pessoa. (até o dia em que os NPCs chegarem no jogo)
Táticas
Construindo
Com os recursos certos, jogadores podem juntar itens para criar novos itens ou melhoria de equipamentos. Clicando no item com o botão direito do mouse (com todos os itens da receita de fabricação presentes no inventário principal), os jogadores podem criar receitas de comida, armas aprimoradas e barricadas para reforçar seus esconderijos. Também é possível usar o menu de criação abaixo do ícone de status do personagem para criar itens, além de encontrar receitas ou melhorias facilmente.
Habilidades
Para ver a habilidade de um personagem, abra a guia Habilidade depois de clicar no coração na interface do usuário (ou tecla de atalho 'L'). A tela "habilidades" aparecerá e mostrará quantos pontos de habilidade você tem, quais habilidades você desbloqueou e quão longe você está de desbloquear uma habilidade. As habilidades são niveladas automaticamente, quando você pratica a tal habilidade, por exemplo, você precisa que o nível de sua carpintaria seja 2 ou maior que isso para fazer um muro de troncos, e para aumentar seu nível de carpintaria, você poderá desmontar móveis ou construir coisas relacionadas a carpintaria.
Limpeza e armazenamento
Você nunca terá suprimentos suficientes para durar a longo prazo, felizmente, existem vários lugares que você poderá saquear. Se você for cuidadoso, as explorações para coleta de suprimentos podem ser um pouco arriscadas, porém recompensadoras.

Escolhendo um local
Conheça o tipo de item que você está tentando encontrar. Se você precisar de suprimentos para construção ou agricultura, encontre um armazém ou loja de ferragens. Se você precisa de comida, casas e lojas provavelmente serão a melhor escolha. Antes de entrar no prédio, planeje sua estratégia de saída. Os suprimentos médicos podem ser encontrados em abundância em alguns dos principais depósitos médicos, com um em Muldraugh e dois em West Point. Tente certificar-se de que existem pelo menos dois pontos de entrada em lados diferentes do edifício, sejam janelas ou portas. Você quer ser capaz de escapar facilmente se os zumbis perceberem sua presença. Se você vir uma janela quebrada, tenha cuidado extra, pois isso pode ser causado por um zumbi que está dentro tentando sair, ou por um zumbi que está do lado de fora tentando entrar!
Quebrando tudo
Antes de entrar, é uma boa ideia dar uma olhada rápida ao redor do prédio apenas para ter certeza de que não há uma horda esperando você do outro lado. Tente também dar uma boa olhada pelas janelas, caso já haja zumbis lá dentro. Entrar por uma janela apenas para descobrir que você está entrando em uma sala cheia de zumbis não será uma boa surpresa!
Sempre tente invadir o mais furtivamente possível, passando pelo lado do prédio com menos zumbis ao redor. Antes mesmo de tentar arrombar alguma coisa, verifique se alguma porta está destrancada. Se estiver bloqueado, você terá que entrar pela janela, basta mover para uma janela e pressionar E, e esperar até que ela abra. Se possível tente não quebrar as janelas, pois isso atrai zumbis. Depois de ter vasculhado e concluído que a sala está livre, feche a janela novamente, pois isso impedirá que qualquer zumbi que esteja te seguindo não surpreenda você.
Alguns edifícios, como lojas, não terão janelas que podem ser abertas; neste caso, você terá que quebrar a janela. Para realizar isso basta bater sua arma corpo a corpo na janela como se fosse um zumbi, em seguida clique com o botão direito na janela e retire os vidros quebrados para não se cortar passando pela janela. Esteja preparado para correr e se esconder depois de fazer isso e não se esqueça de ficar de olho na janela para ver se algum zumbi é atraído.
Ao entrar em qualquer edifício ou residência, há uma chance de que um alarme de roubo soe. Isso atrairá rapidamente grandes quantidades de zumbis nessa área imediatamente. Fuja e tente se abrigar em outro lugar até que o alarme de roubo desapareça. Os alarmes contra roubo atrairão zumbis de longe, então tome cuidado para não se deparar com uma horda que está a caminho da casa. Os zumbis também podem passar 'através' das casas que estiverem no caminho, quebrando portas e janelas.
Tente sempre correr de volta pelo caminho que você veio para a casa, pois você já sabe que essa rota é segura contra zumbis. E em casos extremos, tente correr para o leste, onde há menos zumbis (inferior direito ao desabilitar o modo isométrico do mapa). Uma boa tática para evitar zumbis nesses casos é encontrar um obstáculo paralelo à casa de alarme, como uma longa parede sem janelas ou uma cerca grande. À medida que os zumbis vão direto para a casa de alarme, eles terão que contornar esses grandes obstáculos, criando um lugar seguro para esperar.
Desconfie de subir escadas em prédios, a menos que você tenha uma corda de lençol com você. Se os zumbis invadirem e você ficar preso no andar de cima, sua única saída será a janela, que tem uma grande chance de resultar em morte no acima do primeiro andar é morte certa.
Fazendo a limpa
A menos que você tenha explorado o prédio antes, nunca assuma que é seguro, seja por dentro ou por fora. Tente começar matando todos os zumbis que estão dentro. Pode ser perigoso lutar contra vários zumbis em espaços apertados e pequenos, se você precisar enfrentá-los, é melhor atraí-los para uma área tranquila e matá-los lá. Quando a entrada estiver liberada, feche todas as cortinas nas janelas e (se disponível) e adicione lençóis nas janelas que não tem cortinas ou persianas.
Entre em cada sala com cuidado, tenha sua arma em mãos e pronta para o combate, quando abrir a porta dê um passo para trás imediatamente (solte Ctrl se estiver segurando, ou você atacará a porta caso clique com o botão esquerdo do mouse). Preste muita atenção aos sons de batidas. Quando você terminar de limpar o interior de um prédio, verifique se nenhum zumbi do lado de fora foi alertado sobre sua presença. Nunca corra enquanto estiver dentro de um prédio, a menos que esteja em perigo, pois correr cria barulho que atrai zumbis próximos.
Localizações mais comuns de itens
Certos itens são frequentemente encontrados em determinados contêineres, e esses tipos de contêiner tendem a ser encontrados em locais comuns. As casas, por exemplo, são bons locais para vasculhar, existem muitos alimentos e garrafas de água que são encontrados em geladeiras, utensílios de cozinha, sementes e alimentos não perecíveis são encontrados em armários de cozinha, livros e livros de habilidades são encontrados em prateleiras, remédios são encontrados nos armários de banheiro e bolsas são encontrados em guarda-roupas no quarto. Raramente haverá uma pistola e munição em qualquer um deles.
Reabastecendo o estoque
Combate
When heading out for a supply run, always be prepared. Only go outside during daylight, as you have better visibility during the day. Optionally, start your day by eating something, refilling your Water Bottle and making sure you're not carrying too much before going out. Grab any weapon you can find in your base, preferably a good one like a Baseball Bat or Frying Pan.

When outside, try to walk as often as possible. If you ever stumble upon a horde, you'll be able to run and dodge them without being exhausted. Aside from being more quiet, walking will also save up some energy for fighting without getting exhausted too fast. Every now and then, keep your eyes over your shoulder, as you never know which zombies will follow you. Holding CTRL and circling the mouse around the character will make the player look in the mouse cursor's direction, giving you the ability to spot your enemy before they even see you.
If you ever encounter a horde of zombies (more than five zombies), then the odds are against you. If you encounter such a large group of enemies, turn the other way. If you can't, try to sneak past them. But if the vast majority spotted you, run to your safe house (if it's safe and far away) or just to another destination. Try to run 3-10 corners so you can effectively lose the majority and make it much easier to fend off those who are still following you.
About one to five zombies at once can effectively be dispatched by a Baseball Bat or an Axe (if fought one by one and carefully). When fighting groups, you should use hit-and-run tactics, as zombies do not have much of an attack range, and you can keep exhaustion at bay every 1-3 zombies you kill. Try to spread them out as much as possible by killing the faster ones first. Use the corners of buildings, open windows and open doorways to create bottlenecks to thin out groups. When fighting a group, don't try to immediately dispatch enemies you've knocked down when others are still coming. Instead, use the gap to line up your next attack on the next standing zombie.
When fighting crawlers, try not to fight them from the front. Unless your attack kills a crawler in one hit, you will get injured (and possibly infected), as the crawler does not get stunned from non-fatal blows. Instead, run around it and go behind it. The crawler has to push its body around 180 degrees to get to you, so use its slow speed to your advantage. Do not attempt to fight against huge groups of zombies, since it would be a strenuous, long fight with time that could've been spent more productively.
Never fight with a firearm unless you are sure that you have enough ammo to kill several times as many zombies as you expect to fight (since firearms will draw attention and are nerfed as of b32). Always shoot accurately, since ammo is quite scarce you will want each bullet to count. Try to fight away from your safehouse if you do fight with a firearm. Always be aware of your ammo situation, never fight until the absolute last bullet. Always keep a handful of extra rounds so that you can use them when you need to. Distance is your best friend, zombies cannot attack you if you aren't in arm's length and it gives you more time to reload before they approach you. Moving farther and farther away from your enemies will always help you keep a good distance away from them.
Also, if you hear a helicopter, go indoors then approach the nearest window and wait for a zombie to run past. Depending on the direction it is travelling in, be sure to travel into the opposite direction or make adjustments to your route. This may not have any effect, if there are no zombies within several screens of your location in any given direction. If you are caught in the open for a moment with the helicopter, it will begin to follow you and lure zombies to you for a set amount of time.
You are free to go anywhere you want, however, always try to plan where you're headed, what you'll be taking as loot and where you'll be settling in to make a safe-house.
Explorando mais áreas

Eventually, you will want to get out of your area. Maybe it's because there are no more supplies left, or perhaps it's because you want to start anew somewhere far, far away from the horde, or you just want to reach the Well. When you know you will not be back home for a few days or moving out, always bring a week's worth of food and water with you. It's recommended to take the road, since you can easily get lost in the vast forest (forests can stretch several cells in all directions). A Tent Kit may be needed to sleep in if your travels will prevent you from finding shelter before you reach your destination. Campfire Materials can compliment the tent nicely. Be sure you have something to light the fire with.
Vehicles are almost essential for long-distance travelling and hauling. Items can be stored in seats and the trunk, allowing for more objects to be brought along at a faster pace and not overexerting your character. Depending on the driver and type of vehicle that's being driven, extra items such as (but not limited to) gas, a Jack, and a spare tire to maintain the vehicle. Don't assume that you're safe within your vehicle. You're at risk of getting into an accident that can either injure or kill your character. These risks are also abnormally increased with car wreckages of previous drivers because of the outbreak. Another effect of the car wreckages is that the vehicle will not be capable of being brought everywhere with you so if you want to continue past the car wreckages, it will have to be done by foot. Keep your eyes on the road, be aware of your surroundings, and be prepared to slam on the brakes if necessary.
Saúde
Humor
Throughout your adventure, not only does your character gets hungry and thirsty but can also suffer from other conditions such as anxiety or depression. These status effects, called Moodles, can be treated with varying methods from the use of consumables to just letting a wound heal depending on the character's need. For example, a bored character can be removed by reading a Book or a Magazine, and also moving about outside. The Moodles will also display signs of injuries, which requires first aid.
Exaustão e Sono
Eventualmente seu personagem irá começar a se sentir cansado. Você pode descansar ou dormir em cadeiras, sofás e camas. Se seu personagem está muito agitado, talvez ele precise de Pilulas de sono para dormir. Em grande parte dos servidores multiplayers, a opção de dormir é desabilitada. Você continuará ficando exuasto dos esforços, e você ainda poderá descansar em cadeiras e camas, mas não dormir, você nunca ficará sonolento.
Fome
Over time you will become hungry. The longer you go without food, the weaker you'll become before starvation starts to occur. Eating adequate amounts of edible food avoids that. Be sure to eat perishable foods first as they will expire in one way or another. Make sure to feed your character when they have no hunger-related Moodle, or at least when they're peckish. The hungrier they become, the more food it will take for them to feel satisfied, and the more weight they will loose.
In contrast, overfeeding your character can temporarily make them stronger, carry more items, and gain a positive hunger-related Moodle. Remember that stuffing your character too much will cause them to gain weight and want more food over time.
Portions of food can be fed to your character at a time to manage hunger better. For example, instead of eating whole watermelon, cut it or bash it to make slices or chunks. Then it can be eaten in 1/4, 1/2, or a whole slice or chunk. This can still fill your character up but without wasting so much food. If you're in early game and there's still tons of food lying around, you probably don't have to worry about perishable food conservation, as most of it will rot later anyways.
When looting, remember to take non-perishables to your safe area. It's also a good idea to keep one or two of these in your inventory, just in case.
To find food that isn't in buildings, go closer to or into the woods. Right click a ground tile and select Forage. Depending on your character's Foraging level, you can find things ranging from perishable Berries (Be careful with berries, though. All berry types stack, so take caution to avoid eating the white ones that will poison your character), and to non perishable Mushrooms, insects, Frogs, Stones, Chipped Stones, Twigs, Tree Branches, Worms, Logs, and Wild Eggs. Foraging does tire out your character, though, so make sure the area is safe or you may find yourself exhausted and with a horde near you.
Lastly, we have farming. To farm, you'll need various tools, seeds, and water. Plant your crops in a protected area, since zombies can trample and kill your plants. They can also hide in nearly grown crops and are difficult to see. If you wait until your crops are blooming, you can collect seeds, too. Don't wait too long or your crops will rot.
Sede
Your character gets thirstier faster than they can get hungry, so it's a good idea to have bottled water as soon as possible. If you can't find bottled water, you can improvise by filling up an Empty Bottle up with water. Dehydration works similar to hunger. The thirstier your character becomes, the weaker they get. Currently, there's no positive-related thirst Moodle.
Within months or weeks, the water supply will be cut off. You'll have some stockpiled water but that won't be nearly enough for you to live off of in the long term. One option is to find a Well, which will you give you an endless source of water. There are two known Wells, one is in a farm north of the city. The second is located at a cabin in the woods, slightly closer to the city (almost directly Northeast of McCoy Lumber). If you want to get to one of the Wells, consider living in the farm, which is far away from zombies and has plenty of space for farming and construction.
The best option is to create several Rain Collector Barrels, which may be quite costly in terms of the resources that need to be used. Whenever it rains, these barrels will collect the water from the rain. Although one barrel will not give sufficient water for long-term survival, having many of these barrels will give you enough water to hydrate yourself as well as farm for food without having access to a well. As of build 31, water from these barrels will be tainted. This can make your character sick. You can collect and/or drink river water as well. It will also be tainted and require purifying like rain collector water to keep your character safe.
To purify water collected from the river or Rain Collector Barrels, place down a Campfire with a Campfire Kit and put the water container in the Campfire inventory as you would cook something raw like a Chicken or an Egg. It should purify and be drinkable without any ill-effects once the green skull icon disappears from the water container.
Tratamento de lesões

There are many kinds of injuries that can happen so there are many treatments your character can do to perform on themselves. Keep in mind that you can be damaged by a zombie and not require any method shown below. Being patient and passing time is the best all-round treatment for any injury as long as it was dealt with properly. Good common items to have for treatment are Painkillers, Bandages, Antibiotics, and a Bottle of Disinfectant or something with alcohol in it. If a bandage is needed, make sure to check on it frequently because it could turn dirty and the wound can be infected.
Having a positive Hunger Moodle quickens the recovery process of any injury, fights off infection, and generally makes your character more resilent to sickness in general.
Arranhões
Scratches can happen from crawling through a broken window with no glass removed, climbing over barbed wire, vehicle collisions, or a zombie. If scratched by a zombie, there is a chance of being zombified albeit much smaller compared to being bitten. Disinfect and then bandage.
Feridas Profundas
Common from climbing through windows and falling. It can also be caused from being hit with a heavy bladed weapon like an Axe or getting into a vehicle collision. First use a Suture Needle and then a Bandage. Optionally a Needle with Thread can be used as well but it causes more pain. If there's nothing to stitch up the wound with then applying a bandage will slow down its deterioration and bleeding (be aware that the bandage will become dirty faster).
Objetos alojados
Bullets and glass shards can be lodged inside a deep wound. They must be removed to prevent complications as a result of stitching up the wound. They can be removed with fingers, but using Tweezers is a faster and less painful process. Then, disinfect the wound and deal with the deep wound appropriately. Leaving the object inside speeds up the rate and heightens the chance of the wound getting infected. Out of all the injuries, this is the most likely one to cause infection- particularly for the Deep Wound that it was lodged in.
Mordidas
Zombies are the only source of bites. Out of all the injuries, this is the most efficient way to be zombified. Disinfect, bandage, and then pray.
Queimaduras
Usually caused from being lit on fire. Disinfect and then bandage. A burn follows a fracture in terms of the time it takes to fully heal.
Fraturas
Fractures can happen from extreme vehicle collisions or jumping from a second-story building and higher. A Splint must be made for each fractured limb. Movement will be heavily restricted and even more so when wearing a Splint. Resting and sleeping a lot speeds up recovery. Avoid moving too much as well. Out of all the injuries, a fracture takes the longest to heal back up. Once every week after the first week, take off the Splints to see if the fractures are still there. If so, then simply reapply without moving.
Disinfecting isn't necessary for survival, but it prevents infection. Infection makes the affected area in a worse condition and has greater negative impact on your health.
Morte

Depending on how your character dies, they have a chance to emit loud screams of agony which can attract zombies. One of two possible outcomes will happen to your character when they die.
Cadáver
This is just a regular and normal death. It happens when you fall from a great height, being killed by another player, or bleeding out from being cut on a window. Your character's corpse will be lootable and contain everything in it while they were alive with the exception of what they had in their hands. The items in those hands will be scattered about on the floor around them instead.
Zumbificação
The most common process that occurs after death. After keeling over, soon they will get up as a zombie with a Zombified Moodle. They can't be controlled by the player, and they behave like a normal zombie. Note that they still keep everything they had on them when they were alive. Zombification happens faster if they bleed out shortly after being scratched or bitten by a zombie even if they technically wouldn't have succumbed to it. Interestingly, the zombified character doesn't drop what they had in their hands while they were alive unlike a normal death.
Habilidades
Culinária
Cooking is a skill that allows the player to craft food recipes that restore much more hunger, and/or boredom and unhappiness. It also determines the likelihood of burning certain food items, such as meat. Those foods usually have an Uncooked or Raw prefix in front of their name. As of build 30, Cooking level seven allows the player to use rotten ingredients in some recipes. Cooking can be done on any heat source, from a campfire to an oven.
Carpintaria

In a zombie apocalypse, nowhere is safe. However, that can't stop you from fortifying a safe-house of your interest. Some buildings are safer than others. A two-story house with multiple doors and few windows is recommended. In case of an home invasion, you can always escape through a window using a Sheet Rope. For maximum protection and stealth, board up every window with Planks and Sheets.
Carpenters equipped with a Sledgehammer can destroy walls, doors, and window frames to get rid of them. Materials are rarely yielded from destroying rather than disassembling. If you run out of Planks, you can use an Axe to chop down doors. Chopping down doors will yield one to two wooden planks, along with Door hinges and Doorknobs. Another alternative is to chop down trees. Taking down a tree will yield one to five Logs. You can then use a Saw to craft Logs into Planks.
Later in the game, once you have the tools and resources for larger constructions, you should think about the use of wall pieces. A perimeter wall will prevent zombies from seeing you in your house and will muffle sounds further. Furthermore, you will have more time to escape should your safehouse be invaded. A perimeter fence (any material) can be used to slow down zombies during an invasion. If you have the time and resources, you can make makeshift structures.
Please take note that constructing a safe-house will make a lot of noise, which will draw any stragglers nearby. Carpentry jobs should be done during the day and when the outside is relatively quiet and zombie-free.
Agricultura
agricultura é essencial para o fim do jogo porque a eletricidade eventualmente vai acabar e você será forçado a comer comida não perecível, não é qualquer área exatamente que é abundante em Muldraugh.
Pescaria
Pescar é outra forma alternativa de recursos de comida. Para isso, você precisa de uma vara de pesca e isca.
Caça
Caçar é uma forma de coleta de comida. O jogador pode caçar animais pequenos e usá-los como alimentos. Você vai precisar construir armadilhas (requer qualquer livros de habilidades especiais, além de armadilhas de rato), e use iscas (tal como cenouras ou repolhos) assim coloque a isca na armadilha para ter a captura com sucesso. Tábuas,pregos e fios são os tipos de matérias mais comuns para armadilhas.
Sobrevivência
Some areas can be foraged in, such as the woods surrounding buildings. Right click on the ground and the Forage option may appear while the progress bar fills. If it does not. look elsewhere near the area you're in or move closer to nearby woods, but be cautious because of hiding zombies in cover.
Depending on your characters Foraging skill, you may find edible plants, or building materials like twigs, branches, rocks, etc. Basic shoddy tools can be crafted with these foraged materials if you need a Hammer or Axe in a pinch, but they are not durable.
Mundo
Mapa

It is a bit of an understatement when people say the map is huge. Since it's well...huge! To give you an idea of just how big the map is, here are some figures courtesy of harakka and blindcoder. The map is 20x20 cells + another 12x6 cells. Each of those cells contains about 300x300 tiles. Now some of you will be going "But of course, my good lad!" others will be going "It doesn't sound that big." Here's a picture to show you how big one cell is. Each black square is roughly the size of one cell.
Hopefully that puts things into perspective. Now, the place is huge and it's easy to get lost, so if you would like a helping hand in navigating the map, then you can go check out this Knox County map, it can be especially useful for new survivors as players have marked points of interest. These can include where a decently supplied place is, good fortification locations, to everything your heart desires. So, remember to give it a look if you want.
If you find some odd anomaly around the map, such as a place you can't enter but seemingly could, invisible walls, etc, then you might want to get check out forum thread. Report the problem, so that the developers can fix it! It's incredibly important to report bugs!
Temperatura
A temperatura irá mudar de acordo com as temporadas. Vestir menos roupas de frio durante um dia quente de verão, ou colocar agasalho quando se aproxima uma noite fria cair. Durante o inverno você vai precisar de mais roupas quentes. Fogueira ou outros recursos de calor vão manter você quente.
Luz
Luz pode fazer ficar mais fácil de enxergar enquanto está coletando, mas mesmo com mais acesso você provavelmente vai alertar zombies (especialmente a noite). Luzes em construções podem ser desligadas geralmente.Lanternas são um recurso portável para carregar na mão, mas ela requer Bateria para opera-lo. Lamp on Pillars pode ser construído para adicionar luz ao jogador fazer estruturas.
Clima
- Veja mais: Clima
A chuva pode cair aleatoriamente. Andando ao ar livre na chuva fará seu personagem ficar úmido. Depois de um tempo na chuva você vai ficar encharcado e tem a chance de pegar um resfriado. Uma vez fora da chuva, você vai secar devagar. Você pode acelerar o processo com uma Toalha, geralmente encontrada nos armários do banheiro.
Eventos
Entre o primeiro dia e 2 meses depois da criação do mundo,a água encanada acaba.
O jogador não será mais possível beber água das pias da cozinha,pias de banheiro, ou usar vaso sanitário, e ele/ela não poderá mais encher garrafinhas de água.Depois deste acontecimento, recursos de água serão bem escassos nas residências(garrafinhas de água ou uma panela) não terão mais essa função.A partir desse ponto,o jogador deve continuar se movendo para para conseguir sobreviver com a pouca água que resta das torneiras,mas ele pode construir um coletor de água de barril.
Entre o primeiro dia e 2 meses depois da criação do mundo, a energia elétrica acaba.
As geladeiras e as lâmpadas não vão mais ligar. Você não vai poder cozinhar, exceto com uma fogueira ou churrasqueira. Muito em breve, todas as comidas perecíveis vão estragar e você terá que sobreviver de comidas não perecíveis ou também pode fazer cultivo, pesca, caça, ou armadilhas para conseguir sua própria comida.
Meta-Game Eventos
Recentemente há dois tipos de eventos aleatórios que acontecem pelo jogo. Às vezes os jogadores conseguem ouvir barulhos de tiros ou helicópteros. Os dois têm a mesma função de imigração em massa da população de zumbis e não venha para qualquer lugar atual com recursos. Quando você escutar eles,fique alerta das mudanças das posições e movimentações dos zombies.
Dicas e truques
Here are a few things to always be wary of while playing the game. Being mindful of these things will help you survive longer in Knox County.
- You can only see where you're looking towards. Watch your back.
- Beware of keeping Alarm Clocks or Digital Watches! They may have an alarm already set on when you pick them up. Be sure to disable them so you don't unknowingly become a walking dinner bell.
- While you have running water, fill extra containers with water (mugs, pans, buckets, spare water bottles etc) and stockpile them. When the water is shut off you'll still have some water to spare that won't need purifying.
- Being out in the open is a double-edged sword. There's little cover, meaning there's a high possibility of zombies noticing you.
- Until you have searched the entire building, consider it a dangerous location. Once you know it's empty, start closing curtains and any outside doors and windows for some privacy. After that, start looting.
- Know when to commit to a fight. If fighting, make sure it's extremely imbalanced to your favor.
- Jumping off from the second floor should only be a last resort. Any higher than the second floor though, you will die.
- Be indoors by 8-9 PM and be sleeping at 10-11 PM. Visibility thanks to the sun will make surviving easier.
- Bandages are a life saver. You should always take some with you just in case. Ideally, make them from spare clothes using the "rip sheets" menu command.
- Inspect corpses. They can have interesting items or keys to either buildings or vehicles.
- When you're scavenging and have some space left, take a few items you think you won't need for now. They might be useful later on.
- Moving while sneaking can earn you a very small stream of constant experience. More experience is earned if sneaking around zombies that aren't alerted to your presence.
- If you have friends and a vehicle in the apocalypse, it's recommended to carpool with them. Not only will it save gas by having only one vehicle at a time, it'll generate less noise compared to having each friend have their own vehicle.
- Before opening a door listen for any sounds like footsteps, banging, groans, bags unzipping, or struggling. They will give you clues on who and what could be on the other side.
- At the very beginning, there will never be a zombie in the building you spawn in. Of course, that doesn't mean it's invulnerable to zombies walking inside it later!
- If you manage to find car in relatively good condition and enough gas, you should consider establishing your safehouse in rural area, as it is less dangerous.